Clicky

How to Calibrate Laptop Battery: A Simple Guide to Accurate Readings

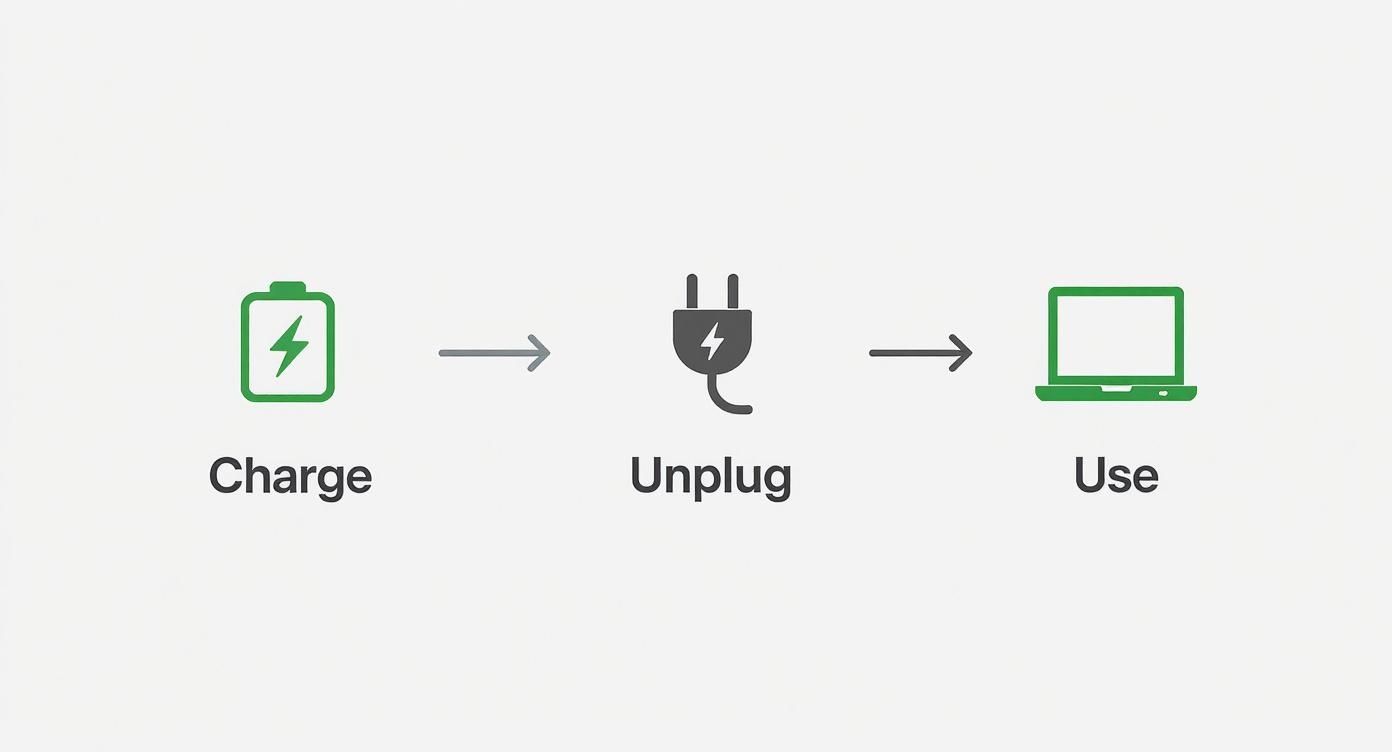
To calibrate your laptop battery, you need to let it go through one full power cycle. It’s a simple but slow process: charge it to 100%, let the battery run down until the laptop turns off by itself, and then charge it back to 100% in one session.

This simple reset helps the battery's internal sensor re-learn its top and bottom limits. This makes sure the percentage you see on your screen is what’s actually left.

Why Your Laptop Battery Percentage Lies to You

Have you ever seen your laptop confidently showing 30% battery, only for it to die a few minutes later? It’s a frustratingly common problem. But it's usually not a sign of a bad battery. Instead, it’s a communication problem between your laptop’s software—its digital “fuel gauge”—and the physical battery itself.

Over time, after hundreds of small charges and top-ups, this gauge starts to get confused. It forgets what a true 100% feels like, and it loses track of where 0% actually is. This “digital confusion” is exactly why knowing how to calibrate your laptop battery is such a useful skill.

What Battery Calibration Really Does

Think of your laptop’s battery like the gas tank in your car. The percentage icon is the fuel gauge on your dashboard. When the car is new, that gauge is perfectly accurate. But what if you only ever added $10 of gas at a time for a year? The sensor might get confused and start showing "half full" when the tank is actually nearly empty.

Calibration is just resetting that gauge. It doesn't magically make an old, worn-out battery hold more charge, nor does it add more fuel to the tank. Its only job is to re-teach your laptop how to read the remaining power correctly. You can trust the number on your screen again.

The process helps the system re-learn the battery's highest and lowest power levels. If you want to dive deeper into the units that measure this, check out our guide on the differences between mAh and Wh.

Signs Your Laptop Battery Needs Calibration

So, how do you know if your battery's gauge is off? The signs are usually pretty obvious. This table breaks down the most common ones.

Symptom What It Means Is Calibration the Fix?
Sudden Shutdowns The laptop dies unexpectedly while showing 15-20% (or more) battery left. Yes, this is the classic sign of a confused battery gauge.
Big Percentage Jumps The battery percentage drops from 40% to 10% in just a few minutes. Very likely. The system is misjudging the remaining charge.
Stuck at a Percentage The battery sits at 100% for an hour after unplugging, or it won't charge past 95%. Often, yes. The gauge can't recognize the true top or bottom limits.
Short Overall Runtimes A full charge just doesn't last as long as it used to. Maybe. If the battery is old, it might just be worn out. Calibration can help you know for sure.

If you're seeing one or more of these issues, a calibration is a good first step before assuming your battery needs to be replaced.

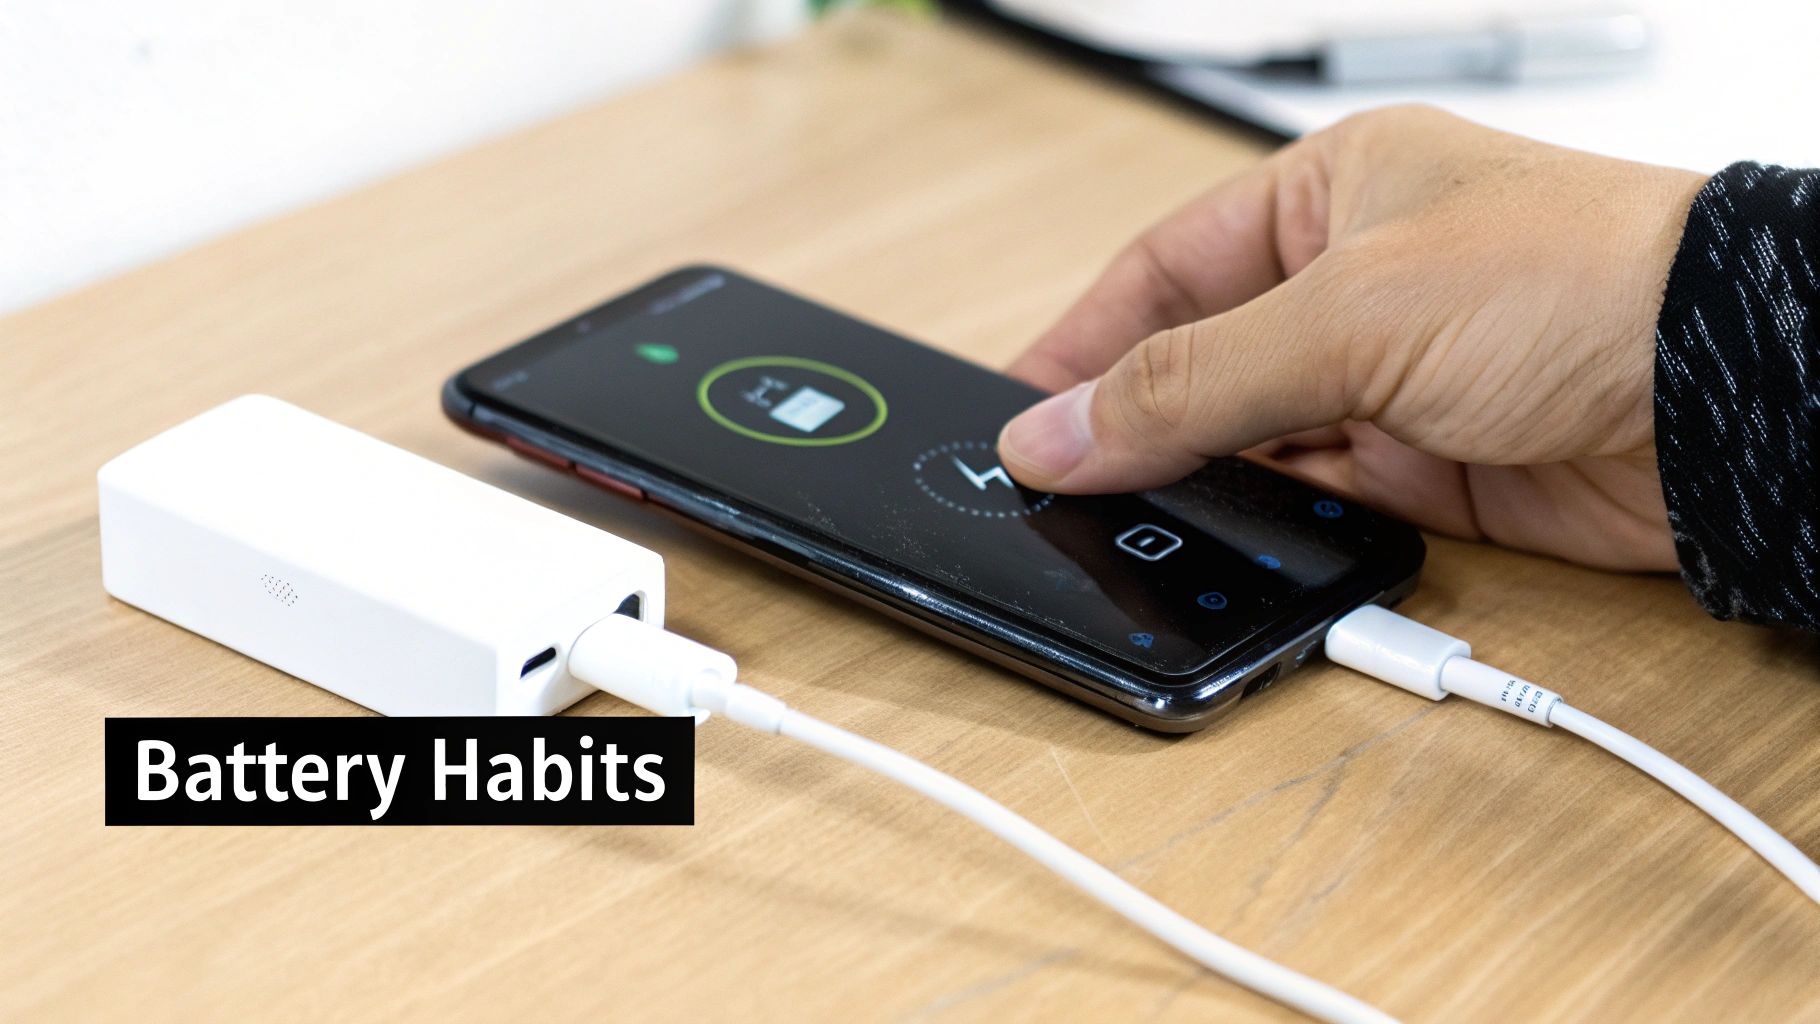
Just like businesses rely on proactive device maintenance to keep their systems healthy, calibrating your battery is a smart step for your laptop. In fact, a battery with a confused gauge can misreport its own health, claiming it has 80% of its original capacity when it’s really closer to 60%—a major cause of those sudden, frustrating shutdowns.

The Complete Laptop Battery Calibration Guide for Windows

If you're a Windows user and your battery percentage seems to be lying to you, don't worry. Getting it back in sync is a pretty simple process, and you don't need to be a tech wizard to do it. You just need a bit of patience.

Let's walk through two solid methods for calibrating your laptop battery on a Windows machine. The goal is to make that little "fuel gauge" on your screen trustworthy again. One method is the classic manual approach that works on just about any Windows laptop, while the other uses the handy automated tools that companies like Dell and Lenovo build right into their systems. Both get the job done, just with different levels of effort.

This little diagram shows exactly what we're talking about—the common cycle of a battery getting "out of sync." It’s where your software's idea of a full battery slowly drifts away from the battery's actual physical state, leading to those frustratingly inaccurate readings.

A diagram illustrating the battery desynchronization process from a full battery to an empty battery after a sync error.

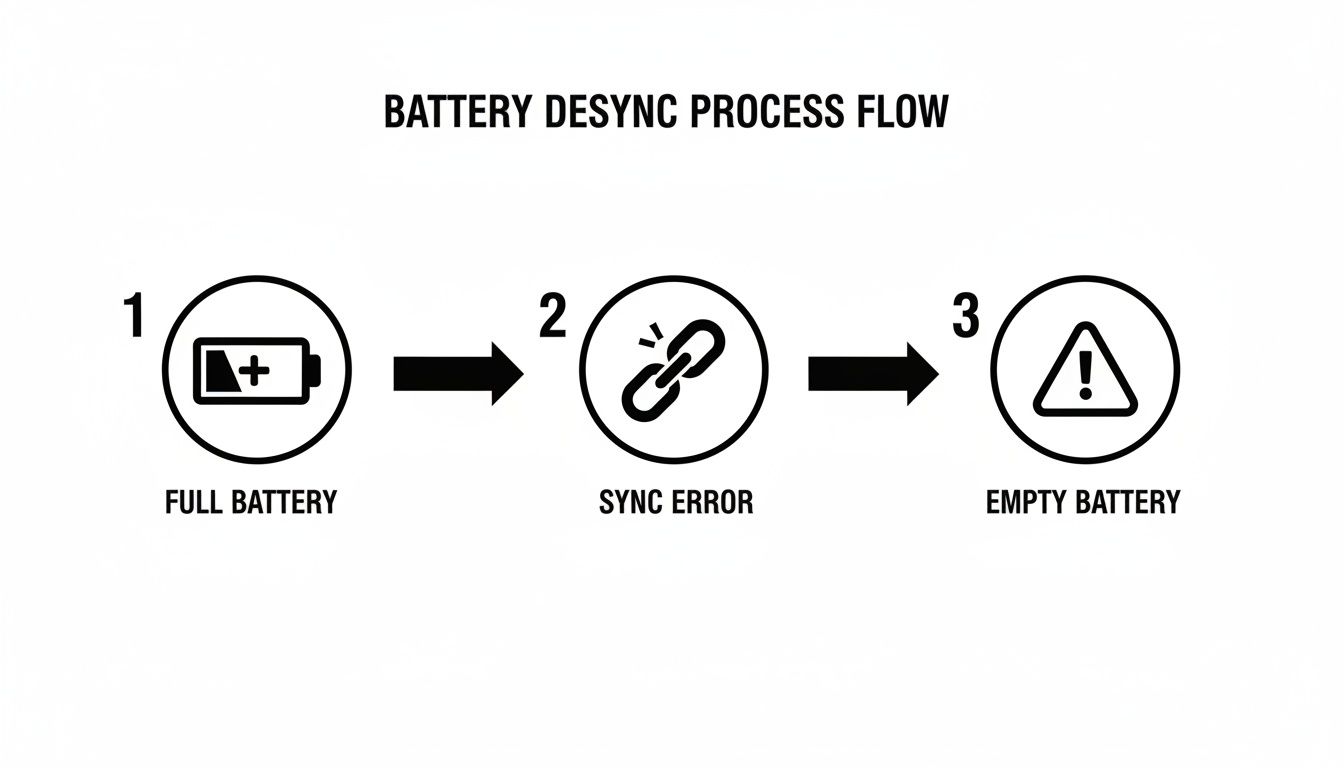
As you can see, the digital reading becomes unreliable over time, causing your laptop to get confused about when the battery is truly empty.

The Universal Manual Calibration Method

This is the old-school, tried-and-true method. It's the most reliable way to get your battery back on track because it doesn't rely on any special software. The process involves a full charge-drain-recharge cycle, which essentially forces the battery's internal sensor to relearn its highest and lowest limits.

This takes a few hours, so it's best to start it when you don't need your laptop for a while—overnight is perfect.

First thing's first: you need to change your power settings to stop the laptop from going to sleep or hibernating on its own. On both Windows 10 and 11, you can find these options in Settings > System > Power & battery (sometimes called "Power & sleep").

Here’s what you need to change:

  • When plugged in, turn off my screen after: Set to Never.
  • When plugged in, put my device to sleep after: Set to Never.
  • On battery power, turn off my screen after: Set to Never.
  • On battery power, put my device to sleep after: Set to Never.

Once you've saved those settings, charge your laptop all the way up to 100%. Then, just to be sure, leave it plugged in for another hour or two. This makes sure the battery is truly full and has had a chance to cool down.

Now for the easy part. Unplug it and let it run until it completely drains and shuts down by itself. Don't use it for heavy tasks; just let it sit there. After it has died, plug it back in and let it charge, without interruption, all the way back to 100%. That's it—your battery's software should now be in sync with its actual capacity.

Using Manufacturer-Specific Calibration Tools

Thankfully, many of the big laptop brands have made this whole process much simpler by building calibration tools right into their own software. These apps automate the entire charge and drain cycle for you. If your laptop has one, this is definitely the easiest way to go.

Here are a few of the most common ones I've run into:

  • Dell Laptops: Check for an application called Dell Power Manager. Inside, you'll usually find a "Battery Health" or "Advanced" section that has a calibration option.
  • Lenovo Laptops: The Lenovo Vantage app is your friend here. Head into the "Power" section, and you should find a "Battery Gauge Reset" feature that will handle the calibration automatically.
  • HP Laptops: HP often puts this feature into its diagnostic tools. To find it, restart your laptop and press the F2 key as it boots up to enter the HP PC Hardware Diagnostics UEFI. From there, you can go to Component Tests > Battery and find the calibration tool.

Pro Tip: Don't panic if an automated calibration seems to get stuck at 99% for a long time. The final part, where the system balances the individual battery cells, can sometimes take an extra hour or more. It’s almost always best to just let it finish, even if it looks frozen.

For business-focused laptops from brands like Dell or HP, which make up a huge 50% of the US market, calibration is a routine and important maintenance task. Their tools often run a full drain test, carefully watching the power levels to spot any hidden issues. A successful calibration can boost the accuracy of your remaining battery time by as much as 90%, which is huge for avoiding unexpected shutdowns during important work.

What if Calibration Doesn't Work?

So, you've run a full calibration cycle, but your battery percentage is still all over the place. What now? If calibration doesn't fix it, the issue might be more than just a software glitch. It could point to a deeper problem with the battery itself.

At this point, it's a good idea to dig a little deeper. You might want to learn more about how to check battery health on your laptop, as this can give you more clues. Running a battery health report in Windows, for example, can show you its original design capacity versus its current full charge capacity—a clear sign of a worn-out battery.

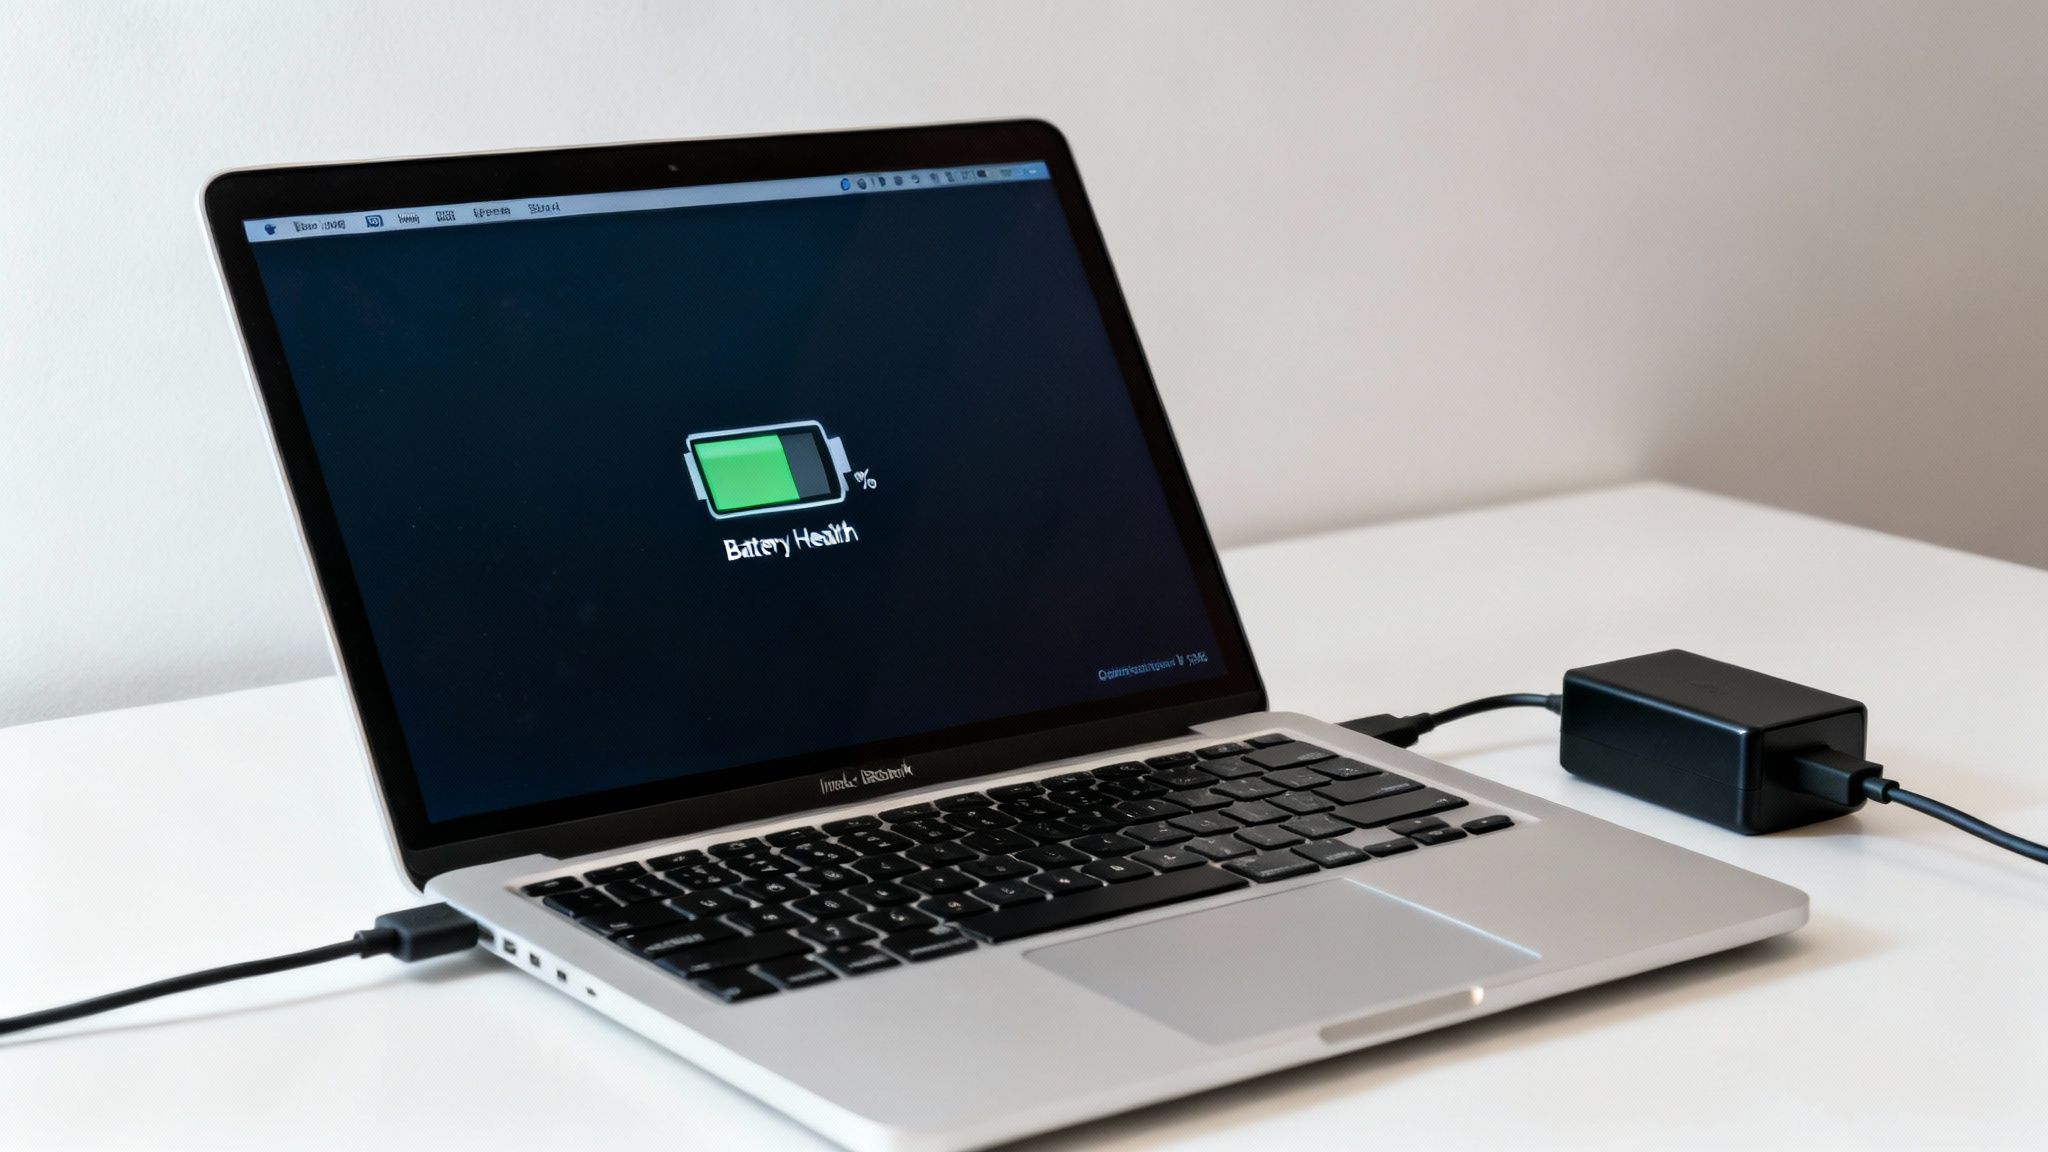
How to Calibrate Your MacBook Battery Correctly

When it comes to battery health, Apple tends to do things its own way. If you're a MacBook owner wondering how to get your battery percentage reading right, the answer really depends on how old your machine is. The good news? For most modern MacBooks, you don't have to do a thing.

A laptop displaying 'Battery Health' on its screen, connected to a charger on a white desk.

Let’s walk through the right process and clear up who needs to do it and who can just let macOS handle everything automatically.

Modern MacBooks Handle It for You

Let's get the most important bit out of the way first. If your MacBook runs on Apple Silicon—that means any model with an M1, M2, M3, or newer chip—your work is already done. These laptops have smart battery management systems that calibrate themselves automatically.

Apple built this tech right in to constantly monitor the battery's condition and capacity, making tiny adjustments as needed. You'll almost certainly never need to perform a manual calibration on these newer models. In fact, forcing a full charge-and-drain cycle can put unnecessary wear on the battery.

Calibration for Older Intel-Based MacBooks

So, who is this guide for? It's for those of us with older, Intel-based MacBooks, typically from 2019 or earlier. These machines lack the fancy, self-managing battery systems of their newer cousins. For them, a manual calibration can be a lifesaver for fixing a quirky battery meter.

If your older MacBook suddenly dies at 20% or the battery indicator seems stuck for ages, this process can get the software and the hardware back in sync.

Keep in mind, this is a patient process. It's best to start it in the evening when you won't need your laptop for a good chunk of time.

  • Charge It to Full Power: Plug in your MacBook and let it charge all the way to 100%. Don't unplug it just yet—leave it on the charger for at least two more hours. This makes sure the battery is truly full and has cooled down.
  • Drain It Completely: Now, unplug the power adapter and use your MacBook like you normally would. Keep going until it completely runs out of power and shuts itself down.
  • Let It Rest: Once it's off, leave the MacBook unplugged for at least five to eight hours. This rest period is very important. It lets the battery settle in its fully empty state so the system can register its true "empty" point.
  • Recharge to 100%: Finally, plug the charger back in and let it charge—without interruption—all the way back to 100%.

After this cycle is complete, your MacBook’s battery gauge should be much more reliable.

This rest period in an empty state is what truly separates a proper calibration from just a normal charge cycle. It gives the battery's internal sensor time to record the lowest possible power level, effectively resetting its baseline for "empty."

When an SMC Reset Is the Better Option

Sometimes, weird battery behavior on an older Intel MacBook isn't a calibration issue at all. The problem could be a confused System Management Controller (SMC). This little chip manages a ton of basic functions, including power, fans, status lights, and battery management.

If you're dealing with problems that go beyond just an inaccurate percentage, an SMC reset might be the answer.

Consider an SMC reset if you notice:

  • The battery refuses to charge even when it's plugged in.
  • The MagSafe charger light isn't behaving correctly (e.g., staying green when it should be orange).
  • The laptop is running unusually hot, or the fans are spinning like crazy for no reason.

Resetting the SMC is a totally different process from calibration and the steps are different for each model. While it won't recalibrate the battery's capacity reading, it can fix the hardware communication problems that make the battery seem faulty. It’s a great troubleshooting step to try if a standard calibration doesn’t sort things out.

Simple Battery Calibration for Chromebooks

Chromebooks have a reputation for being refreshingly simple, and the good news is that their battery maintenance is simple too. If you’ve noticed your Chromebook’s battery meter jumping around or shutting down unexpectedly when it says you have 20% left, you don’t need any fancy tools to get it back on track.

The fix is usually a straightforward power cycle. Unlike some laptops that have special calibration tools, ChromeOS relies on a good old-fashioned “hard reset” of the battery’s internal counter. It’s an easy way to solve a really frustrating problem.

The ChromeOS Calibration Cycle

The whole process comes down to one full charge cycle, but you have to do it in a specific order. This forces the battery management system to relearn the battery’s true empty and full points, which is the key to getting that percentage display back to being accurate.

It's a process that doesn't require much attention, so you can easily start it before you go to bed.

  • Run It Down to Zero: First, just use your Chromebook normally until it completely runs out of power and shuts itself off. Don't plug it in when you see the low battery warning—let it die completely.
  • Let It Rest: This is a very important step. After the Chromebook turns off, leave it unplugged for at least three to five hours. This gives the battery time to fully settle and ensures the system registers a true "empty" state.
  • Charge It Back to Full: Now, plug in your charger and let it charge all the way to 100% without any interruptions. The key here is to leave it alone while it charges. Don't use it, as that can mess with the calibration.

Once your Chromebook hits 100%, you’re done. The calibration is complete, and your battery meter should be back to its reliable self.

This isn't some complex technical procedure. You're simply re-learning the battery's baseline. Letting it sit completely empty forces the system's "memory" of the low-end power level to become accurate again, which is the foundation of a correct battery reading.

Why This Simple Method Works

So what's actually happening here? Over time, especially with lots of partial charges, the software's idea of your battery's capacity can drift away from the battery's actual physical state. That's when you start seeing unreliable percentage readings.

A full drain and recharge cycle makes the system observe the entire power range of the battery, from rock bottom to completely full. This gives the software the data it needs to give you a much more precise estimate of your remaining runtime.

After you've done this, you can learn more about how to maximize your Chromebook battery life to keep it healthy for the long haul. A little maintenance like this can make a huge difference, saving you from those sudden shutdowns right when you need your laptop the most.

When You Should Not Calibrate Your Battery

Calibrating your laptop's battery can be a great way to fix an inaccurate "fuel gauge," but it's important to know its limits. Think of it as a software reset, not a hardware repair. Sometimes, what looks like a calibration issue is actually the battery telling you it's physically worn out. Learning to spot the difference will save you a ton of time and frustration.

A laptop screen displaying a 'Service Battery' warning and a red 'Replace battery' button.

This difference is very important. While calibration gets the software and hardware back in sync, it can’t turn back the clock on the natural chemical aging of a lithium-ion battery.

Your Laptop Is Brand New

If you've just unboxed a shiny new laptop, you can cross calibration off your to-do list. Right out of the factory, manufacturers make sure the battery sensors and the operating system are perfectly in sync.

Running a full drain cycle on a new battery won't hurt anything, but it's completely unnecessary. Just use your new laptop like you normally would. Only start thinking about calibration if you notice some strange battery behavior after a few months of use.

Spotting a Physically Failing Battery

Calibration is for a healthy battery with a confused sensor, not a dying one. A battery on its last legs will show much more serious symptoms—the kind that no amount of software trickery can fix. If you see any of these red flags, it's time to skip the calibration and start looking for a replacement.

So, how can you tell if it's just a reporting problem or something more serious? Deciding whether to recalibrate or replace can be tricky, but this quick guide should help you make the right call.

Calibration vs Replacement: A Quick Guide

Symptom Likely Cause Recommended Action
Laptop dies at 10-15% remaining charge Confusion. The battery's software has lost track of the true empty point. Calibrate. A full charge/drain cycle will reset the sensor.
The body of the laptop is bulging or bent Internal gas buildup. A battery part is failing and swelling, which is a major fire risk. Replace Immediately. Stop using the laptop and get it serviced.
Runtime drops from 5 hours to under 1 hour Severe Wear. The battery's parts can no longer hold a significant charge. Replace. The battery has reached the end of its chemical lifespan.
"Service Battery" or "Replace" system warning Internal Problem. The operating system has found a hardware failure. Replace. Your laptop is telling you the battery is no longer reliable.
Battery percentage jumps around wildly Calibration Error. The sensor is guessing, but the battery itself might be okay. Calibrate. This will help the sensor get an accurate reading again.

Ultimately, your operating system is pretty smart. If it's showing a "Service Battery" or "Replace Soon" alert, it’s not just guessing—it has detected an internal problem. Listen to the warning.

Calibration is essentially a conversation between the battery's parts and its management sensor. When out of sync, the sensor can overestimate capacity by 15-25% after just 50 charge cycles. The reset process re-syncs them, potentially adding up to 20% to the battery's effective lifespan by ensuring it's used correctly. You can learn about how this communication prevents premature failures in business settings by reading the full report from SkyQuestt.com.

Overheating Is a Major Concern

If your laptop gets unusually hot during normal use or while charging, that could also point to a battery problem. Sure, overheating can be caused by blocked vents or a processor working overtime, but a faulty battery is a common cause.

A calibration cycle involves long periods of charging and draining, which can put extra stress on an already struggling battery. If you think the heat is coming from the battery itself, it's much safer to have a professional take a look. Safety always comes first.

Of course, once you get the basics down, you probably still have a few lingering questions. That's completely normal. Getting the details right is the key to actually taking care of your device.

Let's walk through some of the most common questions I hear to clear things up and get you confident about managing your laptop's battery health.

How Often Should I Calibrate My Laptop Battery?

This is easily the question I get asked most, and the answer is way simpler than you'd think: not very often.

For most people, a good rule of thumb is to calibrate your battery once every 2-3 months. Think of it as a seasonal check-up, not a weekly chore. Constantly forcing your battery through full charge-and-drain cycles actually causes more wear and tear than it prevents. The whole idea is to do this maintenance only when you start to see that the battery meter is acting up again.

So, when is it time? Look for these tell-tale signs:

  • You see the percentage drop off a cliff (like from 40% to 10% in just a few minutes).
  • Your laptop dies on you unexpectedly, even when it claims to have 15-20% charge left.
  • The battery percentage seems frozen at a specific number for way too long.

If your battery is behaving itself, just let it be. Over-calibrating is just asking for trouble.

Will Calibration Make My Battery Last Longer?

In short, no—at least not in the way most people hope. Calibration is all about accuracy, not longevity. It doesn't magically breathe new life into worn-out battery parts or add extra hours to an aging battery.

Its real job is simply to make the percentage you see on your screen a number you can actually trust.

Think of it like a water bottle with the measurement lines completely faded. You can still fill it, but you're just guessing how much is inside. Calibration is like re-drawing those lines so you know exactly what you’ve got left to work with.

A calibrated battery won't turn a three-hour battery back into a six-hour one. What it will do is give you a reliable three-hour countdown instead of shutting down an hour in while still showing 50% left. It stops the surprises.

So while it won't extend the total runtime of an old battery, it makes the time you do have predictable and genuinely useful.

Is It Safe to Drain My Battery to Zero?

Yes, but with a big catch: it's safe only when you are doing it specifically for calibration. Laptops have built-in safety features that prevent the battery from draining so low that it causes permanent damage.

When your laptop finally shuts down at "0%," there's still a tiny reserved charge left behind. This is to protect the battery parts from a dangerously deep drain. That controlled shutdown is a key part of the process, as it lets the battery management system find and log the true "empty" point.

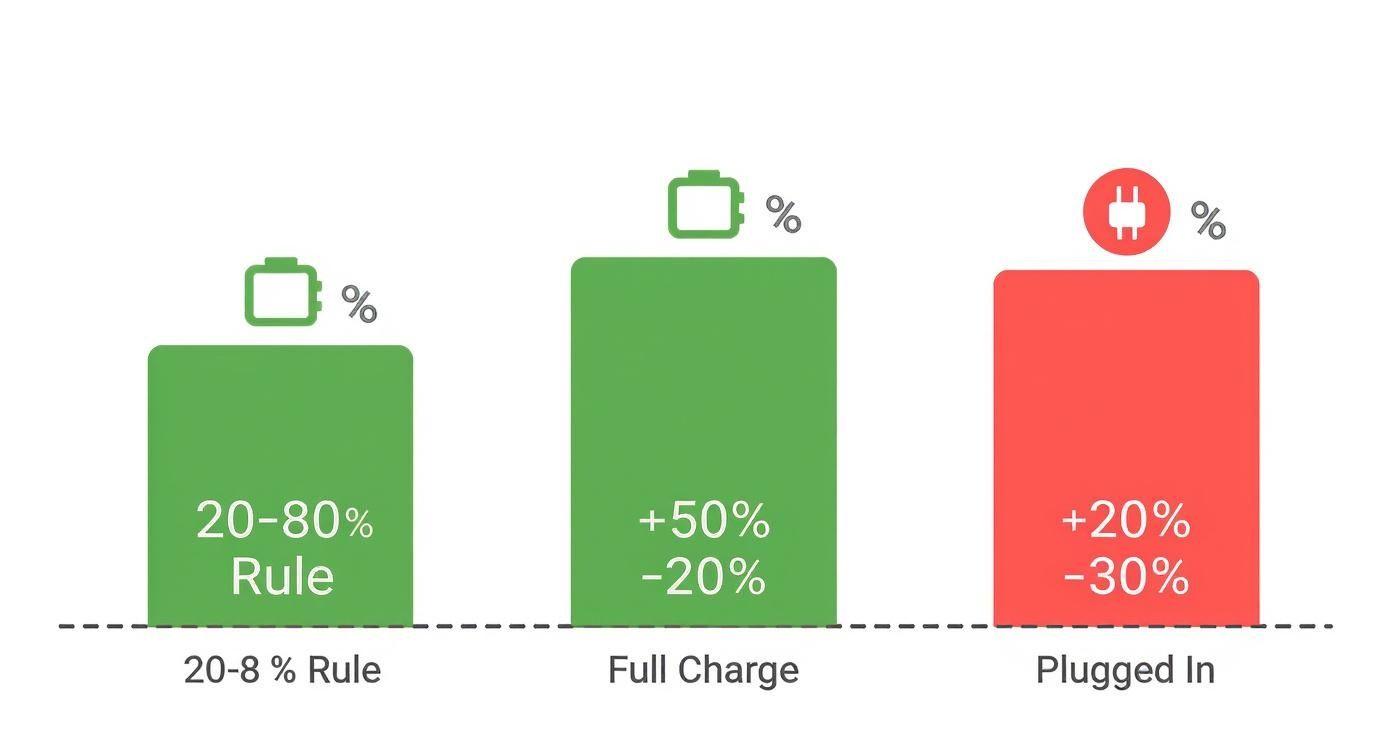
You absolutely should not make a habit of this, though. For everyday use, it's much healthier for a lithium-ion battery to live between 20% and 80% charge. Routinely running it down to zero will only speed up its decline.

Do I Need to Turn Off Battery Saver Features?

Absolutely. This is a step people miss all the time, and it can completely ruin the calibration.

Most modern laptops have smart charging or battery-saver features meant to extend the battery's lifespan, often by stopping the charge before it hits 100%. These are great for daily use, but they will completely stop a calibration from working.

The whole point of this process is for the system to see the absolute top and bottom of the battery's capacity. If a "battery care" mode stops the charge at 80%, the system will mistakenly log that as the new 100%, making your readings even more inaccurate.

Before you start, make sure you:

  • Open your laptop's built-in power management software (like Dell Power Manager, Lenovo Vantage, or MyASUS).
  • Temporarily disable any feature labeled "Battery Health Charging," "Charge Limiter," or "Optimized Charging."
  • Let the laptop charge all the way to a true 100% without these limits in place.

As soon as the calibration is done, be sure to turn those protective features right back on.


Extending your battery's life isn't just about the occasional calibration; it's about smarter charging, every single day. With a tool like Chargie, you can put healthy charging habits on autopilot, preventing the overnight wear that degrades your battery in the first place. By keeping your battery in the optimal 20-80% range, you can significantly prolong its lifespan and find you don't need to calibrate nearly as often. Learn more about how you can protect your investment at https://chargie.org.

Extend Laptop Battery Life with These Simple Tricks

If you want to get more hours out of your laptop battery, the game plan is pretty simple. It boils down to two things: using less power and charging smarter. Quick tweaks like dimming your screen, closing apps you aren't using, and turning on your laptop's built-in battery saver mode can give you a surprising amount of extra time away from the wall. But for the long haul, the real secret is breaking bad habits—like letting your battery die completely or leaving it plugged in at 100% all day long.

Why Your Laptop Battery Wears Out

Modern silver laptop and smartphone on a wooden cafe table, promoting 'More Battery Hours' for tech users.

Ever feel like your laptop is constantly begging for its charger? You’re not alone. That frustration of a battery that just can't hold a charge is a common problem, but once you understand why it's happening, you can actually do something about it.

The hard truth is that every laptop battery has a limited lifespan. From the moment you start using it, its ability to hold a charge begins to fade. It’s a completely natural process, like a slow aging process for the battery's insides.

I like to think of a new battery as a big water bottle. When it’s brand new, you can fill it to the brim. But over years of use, that bottle slowly shrinks. You can still fill it to the "top," but the total amount of water it holds is less. That’s exactly what’s going on inside your laptop’s battery. Every time you charge and use it, tiny changes happen inside that slowly reduce how much power it can store.

The Real Culprits Behind Battery Drain

While age is a factor, your daily habits are what really speed up your battery's decline. Three things are particularly tough on its health.

  • Keeping It Fully Charged: Leaving your battery at 100% for long stretches is like holding a rubber band at its absolute limit—it creates constant strain and wears it out fast.
  • Too Much Heat: Heat is the worst enemy of battery health. Leaving your laptop in a hot car or, more commonly, blocking its air vents by using it on a bed or couch, generates heat that permanently damages the battery.
  • Letting It Die Completely: Constantly running your battery down to 0% is just as stressful. Modern batteries are much happier when you keep them in that sweet spot, somewhere in the middle of their charge range.

Thankfully, the tech has gotten better. Over the last decade, the average power of laptop batteries has jumped from around 40 watt-hours to roughly 60 watt-hours. For many new models, that means you can get well over 10 hours of real-world use on a single charge. You can dig into more of the data on the evolution of laptop battery capacity if you're curious.

This guide will walk you through how to manage these factors, moving beyond general advice to give you practical, tested tips that actually work.

Quick Wins to Boost Your Battery Life Today

Feeling overwhelmed? Don't be. Here are some of the easiest changes you can make right now to see an immediate difference in your battery's daily performance.

Tactic Impact Level Time to Implement
Lower screen brightness to 50-70% High ~5 seconds
Turn on Battery Saver / Low Power Mode High ~10 seconds
Unplug unused devices (docks, drives) Medium ~5 seconds
Close background apps you're not using Medium ~30 seconds
Turn off Bluetooth and Wi-Fi when not needed Low-Medium ~10 seconds

Making even one or two of these changes a regular habit can add a noticeable amount of runtime to your day, buying you precious time when you're away from an outlet.

Change Your Built-In Power Settings

Your laptop is a lot smarter than you might think. Hidden away in its settings are some seriously powerful tools designed to manage power and extend laptop battery life. Most people never even look at them, but tweaking just a few things can give you hours of extra runtime.

Think of it like the "eco" mode in your car that uses less gas. Your laptop has the same kind of feature. By simply telling your machine to focus on saving power instead of going full speed when it's unplugged, you can make a massive difference.

These settings handle everything from how quickly your screen dims to how much power your computer is allowed to use. Let's get into the details of adjusting these for both Windows and macOS.

Master Windows Power and Battery Settings

Windows actually gives you a ton of control right out of the box. You don’t need to be a tech expert to find and adjust these settings, and a few clicks can set your laptop up for long stretches away from a power outlet.

The main control area for all this is the Power & Battery menu. On Windows 11, just head to Settings > System > Power & Battery. The first thing you'll see is a slider with a few power modes, usually "Best power efficiency," "Balanced," and "Best performance."

When you're running on battery, flipping that switch to Best power efficiency is the single most effective thing you can do. One click and Windows will automatically slow down background activity and dim the screen a bit to save energy.

But we can dig a little deeper for even more savings:

  • Turn on Battery Saver: This mode is a real lifesaver when you're running low. It usually turns on automatically (you can set the level, often 20%) and cuts down on background activity and notifications. You can also just turn it on yourself whenever you want.
  • Control Background Apps: Some apps are known for running in the background, constantly checking for updates and syncing data. In your battery settings, you can see a list of the worst power-drainers and stop them from doing this behind your back.
  • Adjust Sleep and Screen Timers: This one is huge. Set your screen to turn off after just a minute or two of inactivity and the laptop to go to sleep after five or ten. Those small gaps when you're not using it really add up over a day.

A common mistake I see all the time is people leaving their power mode on "Best performance" while on battery. This makes the computer work at full speed and burns through your battery, often for simple tasks like writing an email that don't need that much power.

By making a habit of this, you’re not just reacting to a low battery warning—you’re actively managing your power from the second you unplug.

Configure macOS for Maximum Efficiency

Apple users, you're not left out. macOS has its own excellent set of tools to help you squeeze every last drop out of a charge. The idea is the same as with Windows: cut out the unnecessary stuff and optimize for what you're actually doing.

The star of the show here is Low Power Mode. You'll find it under System Settings > Battery. Just like on your iPhone, turning this on lowers screen brightness and reduces system power for background tasks. It's a simple, one-click way to immediately extend laptop battery life.

If you want more control, click on "Options" within the Battery settings. This is where you can make some really helpful tweaks:

  • Optimize video streaming on battery: This great feature tells your Mac to play certain high-quality videos in a standard format when you're unplugged, which uses way less power.
  • Put hard disks to sleep when possible: If your Mac has an older-style hard drive (or you have an external one plugged in), this will power it down when it's not being used.
  • Wake for network access: Turning this off stops your Mac from waking from sleep just because another device on your network wants to connect to it. Keep it asleep until you need it.

One of the most useful tools on any Mac is the Activity Monitor, which is in your Utilities folder. Head over to the "Energy" tab, and you'll get a real-time list of which apps are the biggest power hogs. If you see an app with a high "Energy Impact" that you aren't even using, just quitting it can give you an instant battery boost.

Get Smart About Your Charging Habits

How you charge your laptop is a massive piece of the battery life puzzle. We’ve all been bombarded with conflicting advice over the years: drain it to zero, never unplug it, only charge to 80%. Let's cut through the noise and get straight to what actually works, based on how the batteries inside our laptops work.

The little habits you form around charging can make a world of difference, preventing your battery from aging too quickly and keeping your laptop dependable for years. This isn't about following a super-strict routine, but about making small, consistent changes that reduce the stress on your battery.

Live by the 20-80 Rule

Picture your laptop's battery like an athlete. It’s happiest and performs best when it’s not completely worn out or pushed to its absolute breaking point for hours on end. The same idea applies perfectly to the battery.

Keeping your battery at 100% or letting it die completely puts a ton of stress on it. The real sweet spot, where the battery is most comfortable, is somewhere in the middle. This is where the famous "20-80 rule" comes in, and it's your single best guideline.

  • Try to plug your laptop in when it hits around 20%.
  • Then, make a point to unplug it once it reaches about 80%.

That's it. This simple routine helps you avoid the stress of a full charge and the strain of a completely empty battery. You're basically keeping the battery in its happy place, which dramatically slows down the aging that kills its ability to hold a charge over time.

There's a common myth that you need to "train" a new battery by letting it die completely. While that was true for very old types of batteries, it's actually damaging to the modern batteries in every laptop made today. Sticking to the 20-80 range is a far, far healthier practice.

Heat Is the Enemy—Especially While Charging

If there’s one public enemy number one for battery life, it’s heat. When a battery gets hot, the processes inside speed up, which rapidly wears it out. Charging naturally creates a bit of heat, but you can easily keep it under control.

First rule: never charge your laptop on a soft surface like your bed, a couch, or a fluffy blanket. These materials trap heat and completely block the air vents on your device. It creates a mini-oven effect that literally cooks your battery.

Instead, always charge your laptop on a hard, flat surface like a desk or a table. This gives the vents room to breathe and allows air to flow freely, keeping the whole system—and your battery—cool. If your laptop often feels hot to the touch, propping it up on a simple laptop stand is a great way to improve airflow even more.

What if You're Always Plugged In?

A lot of us use our laptops like desktop computers, which means they're connected to the charger all day long. It's convenient, sure, but it also keeps the battery at a constant 100% charge—a high-stress state that's not great for its long-term health.

If this sounds like your daily setup, you've got a few solid options to protect your battery:

  1. Check for built-in battery care tools: Many manufacturers (like Dell, HP, and Lenovo) know this is an issue and include software that lets you set a maximum charge limit, often right around that ideal 80% mark. Look in your laptop’s system settings for features like "battery care," "conservation mode," or "charge threshold."
  2. Do it manually: Get into the habit of unplugging your laptop for a bit each day. Just let the battery run down to 40% or 50% before you plug it back in. It's a simple way to give it a break from that constant high-stress state.
  3. Automate it with a smart device: This is the set-it-and-forget-it solution. A tool like Chargie can manage this process for you automatically. You just tell it to stop the charge at 80%, and it handles the rest, giving you perfect charging habits without you ever having to think about it.

Real-world testing shows just how much these habits matter. One study found that laptops used by students could get anywhere from 5 to 8 hours of runtime. That huge difference wasn't just due to the hardware; it was a direct result of user habits like charging routines and screen brightness. You can see more on how personal habits impact battery performance on Laptop Mag. Adopting these smarter habits puts you firmly in control of which end of that range your laptop lands on.

Choose the Right Hardware and Accessories

While your daily habits and software settings are a huge part of the puzzle, the actual hardware you use plays a massive role in the battle to extend laptop battery life. From the charger you plug in every day to the parts inside your machine, making smart choices can either protect your battery or send it to an early grave.

It’s not just about what you do, but what you use. The right accessories can help you form good habits and protect your device, while the wrong ones can slowly damage your battery’s health without you even realizing it.

This simple cycle is the core idea of a healthy battery routine: actively manage the process rather than just leaving the device plugged in 24/7.

A diagram illustrating the steps: charge a battery, unplug the power, and then use a laptop.

Automate Healthy Charging with Smart Tools

We’ve already talked about how keeping your battery between 20% and 80% is the sweet spot for long-term health. The problem? Remembering to unplug your laptop at just the right moment is a real pain. It's far too easy to plug it in and completely forget, leaving the battery sitting at a stressful 100% charge for hours—or even days—on end.

This is exactly where a piece of smart hardware can be a game-changer. A device like Chargie was made to solve this specific problem. It's a small USB-C device that sits between your charger and your laptop, acting as a smart gatekeeper for the power flowing into your machine.

Using its app, you can set a hard charging limit—say, 80%. The second your laptop hits that level, Chargie simply cuts the power. It's a true set-it-and-forget-it solution that enforces perfect charging habits for you, day in and day out, preventing the high-voltage stress that wears out your battery over time.

Setting Up Chargie for Optimal Protection

Getting started with Chargie is designed to be super simple. The whole idea is to make healthy charging an automatic background process you never have to think about again.

Here's how you can use the 80% charge limit and other battery-saving features using the device.

Chargie Setup for Optimal Battery Health

Step Action Expected Outcome
1. Connect Hardware Plug the Chargie device into your charger's cable, then connect the other end to your laptop’s USB-C port. The device is now physically in line to control the power flow.
2. Install the App Download and install the Chargie app on your phone or computer. It works with Windows, macOS, and others. You now have the software needed to control the hardware.
3. Set the Limit Open the app and use the slider to set the maximum charge level to 80%. Chargie will now automatically stop charging once the battery reaches 80%.
4. Use Scheduling (Optional) In the app's scheduler, set the battery to stay at a lower level (e.g., 50%) overnight and then top up to 80% before your workday starts. This reduces the time spent at higher charge levels, further easing stress on the battery.

By following these steps, you're not just preventing overcharging; you're actively managing the battery's charge level to keep it in its happiest, healthiest range for as long as possible.

Why Your Choice of Charger Matters

When you lose or break your original charger, it's tempting to go online and grab the cheapest generic replacement you can find. Honestly, this is one of the riskiest things you can do for your laptop's battery.

Your laptop’s original charger isn't just a power cord; it's designed to talk to your device, delivering the exact, stable power the battery was made for. Cheap, uncertified chargers often cut corners on important safety features and quality parts.

An uncertified charger can deliver inconsistent power, sending "dirty" electricity into your battery. This can cause overheating, inefficient charging, and, in the worst cases, permanent damage to both the battery and the computer itself.

Think of it like this: you can survive on junk food, but you’ll feel and perform much better with high-quality food. Your battery feels the same way about the electricity it gets. You can dive deeper into the specifics of how many watts are needed to charge a laptop in our detailed guide, which breaks down why matching your charger to your device is so important.

Energy-Efficient Components and Other Accessories

When it's finally time to buy a new laptop, keep an eye out for models with modern, power-saving computer chips. Chips like Intel's Core Ultra series or Apple's M-series are built to use less power, which directly means more battery time for you. Learning about different battery technologies can also be useful—for instance, understanding the best battery types for trail cameras shows how different types are made for long life in other gadgets.

Finally, be mindful of the accessories you leave plugged in. Docks, external hard drives, and even some fancy USB mice can draw a surprising amount of power. Unplugging them when you're running on battery is a simple but effective trick to save energy and squeeze out a little more time before you need to find an outlet.

Keep Your Laptop in Fighting Shape with Essential Maintenance

Think of your laptop's battery like a car engine. You wouldn't skip an oil change for years and expect it to run smoothly, right? The same logic applies here. A little bit of maintenance goes a long way in preventing those frustrating moments when your laptop suddenly dies, even though the battery meter swore you had 20% left.

You don't need to be a tech expert to do this. By spending just a little time on two key tasks every few months—battery calibration and software updates—you can keep your machine running reliably. These are simple habits that pay off big in the long run.

A laptop displaying a battery calibration icon and progress bar with 'Calibrate & Update' text on a desk.

What Is Battery Calibration (And Why Bother)?

We've all been there. You're working on something important, glance at the battery icon, and see what looks like plenty of power left. Then, boom—the screen goes black. This is the classic sign of a battery meter that's out of sync.

The software that shows you that percentage is really just making an educated guess. Over time, as your battery naturally ages and its maximum power level decreases, that guess gets more and more inaccurate. Calibration is how you "re-teach" the software what "full" and "empty" actually mean for your battery right now.

It’s a simple reset that gives your computer a much more trustworthy estimate of your remaining runtime, stopping those sudden shutdowns.

Think of it like this: calibrating your battery is like resetting the fuel gauge in your car. It doesn't magically add more gas to the tank, but it ensures the gauge you're looking at is telling you the truth about what's left.

Doing a full calibration every two to three months is a solid routine. If you really want to get under the hood and track your battery's condition, our guide on how to check your laptop's battery health is a great next step.

How to Recalibrate Your Laptop Battery

The process itself is pretty simple and just involves running through a full charge cycle. While the exact menu options might be a little different between brands, the core idea is the same everywhere.

Here’s the game plan:

  • Charge It to 100%: Plug in your laptop and let it charge completely to 100%. Don't unplug it right away—leave it on the charger for another hour or two. This makes sure it's truly full and has had a chance to cool down.
  • Drain It Completely: Now, unplug the charger and just use your laptop normally until it shuts down on its own. You have to let it die completely. Pro-tip: you can speed this up by temporarily turning off your sleep and screen-off settings in your power options.
  • Let It Rest: Once it has shut itself down, leave it unplugged for at least three to five hours. This lets the battery fully settle while empty.
  • Recharge to 100% (Without Stopping): Finally, plug it back in and let it charge all the way to 100% in one go, without using it or unplugging it.

That’s it! Your battery meter should now be giving you a much more accurate picture of its real power, helping you better plan your time away from an outlet.

Don't Skip Your Software and Driver Updates

This is probably one of the easiest and most overlooked ways to extend laptop battery life. It might not seem directly related, but developers at Microsoft, Apple, and hardware companies like Intel are always tweaking their software to be more efficient.

These updates aren't just for new features; they often include important bug fixes and performance improvements aimed at reducing power use. An old, un-optimized program for your graphics, for instance, could be making your hardware work way harder than it needs to, secretly draining your battery.

Keep an eye out for these:

  • Operating System Updates: Both Windows and macOS release power-saving improvements all the time.
  • Driver Updates: Make sure the special software for your computer chips and graphics card are current.
  • Application Updates: Even your browser and other daily-use apps get updates that can make them use less power.

Making it a habit to install updates is more than just good for security. It’s a completely free way to ensure your laptop is running as efficiently as possible.

How IT Teams Can Streamline Battery Management

Managing your own laptop's battery is one thing. But when you're responsible for an entire fleet of devices, the challenge gets a lot bigger. For IT managers, the real goal is to extend laptop battery life across many computers. Get it right, and you’re directly protecting the company's hardware investment, cutting down on employee downtime, and getting fewer support tickets.

It's not as simple as sending out an email with a few "best practices." To really make a difference, you need a central, enforceable strategy that doesn't rely on individual users remembering to do anything. This is where special management tools really shine.

Use Central Tools to Enforce Smart Policies

Management tools give IT teams the remote control they need to set up and enforce power-saving rules across every single company-owned laptop. Instead of hoping employees adjust their settings, you can just push out a standard setup that creates a baseline for efficiency.

This approach means every device is optimized automatically, with zero extra effort from your team or the user. Some of the most effective policies you can set up are pretty straightforward:

  • Standardize Screen Timeouts: Set all screens to turn off after 2-3 minutes of inactivity. Have the devices themselves go to sleep after 10-15 minutes.
  • Restrict Background Apps: Block non-essential apps from quietly draining power in the background.
  • Disable Unused Hardware: If a user doesn't need Bluetooth, turn it off remotely. Same goes for other hardware features.

These automated rules create a consistent standard for power management. It takes all the guesswork out of the equation and ensures devices are always operating as efficiently as possible.

Deploy Hardware for Automated Fleet Health

Management policies are great for controlling how devices use power, but they can't touch the biggest factor in battery wear: physical charging habits. This is where a hardware solution like Chargie becomes a game-changer for an entire fleet.

By giving a Chargie to every user, you can automate healthy charging and stop early battery failure across the board. Imagine setting a universal charge limit of 80% across every device. This simple step protects the entire fleet from the high-voltage stress that comes from being left plugged in 24/7. It’s a proactive move that helps you break the costly cycle of replacing batteries—or entire laptops—every couple of years.

And this isn't a small problem. The global laptop battery market is valued at around $8.1 billion and is expected to climb to $12.1 billion in the next decade. That's a clear sign that preserving battery health is a massive priority. You can learn more about the expanding laptop battery market on persistencemarketresearch.com.

For any IT team, keeping a close eye on battery health reports is a must. A battery that's been charged and drained many times is a warning sign that it's aging and about to fail. Identifying these devices early lets you schedule maintenance instead of dealing with surprise failures that kill productivity.

Putting these hardware and software strategies together is a core part of any good device management plan. For a deeper dive, check out our guide on IT asset management best practices. By combining smart policies with automated hardware, IT teams can seriously extend the lifespan of their device fleet, cut replacement costs, and keep everyone working without interruption.

Got Laptop Battery Questions? We've Got Answers

Digging into the world of laptop batteries often feels like you're trying to separate fact from fiction. Everyone seems to have a strong opinion, but getting the real story can make a massive difference in how long your battery actually lasts. Let's clear the air and tackle some of the most common questions people have when they're trying to extend their laptop battery life.

Getting this right isn't just about tech trivia; it’s about building smarter habits that protect your laptop and keep you working away from a power outlet for as long as possible.

Is It Really That Bad to Leave My Laptop Plugged In All the Time?

In most cases, yes, it can be. While modern laptops are smart enough to stop charging once they hit 100%, holding a battery at that full-charge state puts it under constant high-voltage stress. A good comparison is a rubber band that's always stretched to its limit—eventually, it wears out. This state speeds up the aging process inside the battery.

Plus, there’s the issue of heat. A laptop that's always plugged in tends to run a bit warmer, and heat is the worst enemy of battery health, speeding up wear even further. It’s much healthier for the battery to be used a bit and not stay full all the time. If your laptop spends most of its life on a desk, the best thing you can do is use a tool to limit the charge to a healthier level, like 80%, to take that stress off.

How Often Should I Bother Calibrating My Laptop Battery?

Honestly, this isn't something you need to lose sleep over. For most laptops today, running a full calibration once every two or three months is plenty. The main point of calibration isn't to magically improve the battery's physical health, but to re-sync the software that tells you how much power is left.

The classic sign that you need to calibrate is when your laptop suddenly dies on you, even though the battery meter insisted you still had 10% or 20% left. That’s your computer telling you its guess is way off, and it's time for a reset.

Is It Safe to Use a Third-Party Replacement Battery?

It's a bit of a gamble, to be honest. While there are some decent third-party brands out there, the market is also full of low-quality knockoffs. These cheaper batteries often cut corners with lower-quality parts and might be missing the important safety and temperature control features you'd find in an official battery from the manufacturer.

Using a poor-quality replacement can lead to a host of problems:

  • A much shorter lifespan compared to the original.
  • Bad performance and a charge meter that’s never accurate.
  • In a worst-case scenario, it could overheat and damage your laptop's internal parts.

Whenever you can, sticking with an official battery from your laptop's manufacturer is the safest bet. It guarantees you're getting the quality, compatibility, and safety features your machine was designed for.


Tired of micromanaging your charging habits? Chargie is the set-it-and-forget-it solution that safeguards your battery by automatically keeping it at optimal charge levels. Find out how Chargie can extend the life of your devices.

How to Preserve Laptop Battery for Longer Life

Keeping your laptop battery healthy isn't a secret—it just comes down to a few good habits. If you can get the hang of smart charging, keep it from getting too hot, and use a few simple settings, you'll be set. The biggest wins come from keeping the charge level between 20% and 80%, making sure it doesn't overheat, and using the power-saving modes built right into your laptop.

Your Quick Guide to Better Laptop Battery Health

Think of your laptop's battery like a good tool. You wouldn't leave a power drill out in the rain, right? It's the same idea. It needs a bit of care to stay strong. Many of us have habits that slowly wear down the battery, like leaving it plugged in at 100% all day or using it on a blanket that blocks the air vents.

The goal is simple: reduce the stress on the battery.

Luckily, you don't need to be a tech genius to make a real difference. Small, steady changes to your daily routine can easily add months, or even years, of good performance to your device. This guide is all about helpful advice you can start using right away.

A silver laptop, documents, and a pen on a wooden desk, with 'QUICK BATTERY TIPS' text.

Core Strategies at a Glance

To get you started, let's jump straight to the most important things you can do. Each of these tips fights a common cause of battery wear, from chemical strain to heat damage. We'll go into more detail later, but this gives you a powerful starting point.

If you remember just one thing, make it this: avoid extremes. Extreme heat and extreme charge levels (both 0% and 100%) are the two biggest enemies of your battery.

By getting these core ideas in your head, you can switch from just reacting—plugging in when you see that scary low-battery warning—to actively protecting its health. It’s a change in thinking that helps your laptop stay the reliable, portable tool you need it to be for as long as possible.

Here’s a quick breakdown of these basic strategies, explaining what to do and why it matters for your device's long-term health.

Core Laptop Battery Preservation Strategies

This table sums up the best things you can do to preserve your laptop's battery, the simple steps to take, and the long-term benefit for your device.

Strategy Action Required Expected Benefit
Smart Charging Try to keep the battery between 20% and 80%. Avoid leaving it plugged in at 100% for long periods. Reduces stress on the battery, which can make its useful life last up to 50% longer.
Temperature Control Keep the laptop cool. Avoid direct sunlight and make sure air vents aren't blocked (for example, by blankets or pillows). Prevents permanent damage caused by heat, which is a leading cause of battery problems.
Software Optimization Turn on your laptop's built-in "Battery Saver" or "Low Power Mode" and lower your screen brightness. Uses less power right away, letting you get more done on a single charge and cutting down the total number of times you need to charge it over time.

Getting these three things right will put you way ahead of the game in keeping your battery in top shape.

Master Your Charging Habits for a Longer Lifespan

How you plug in your laptop is probably the single biggest factor in how long its battery will last. Most of us grew up thinking we should always charge our devices to 100% and keep them full. It just feels right. But for the kind of batteries inside our laptops, that habit is actually doing more harm than good.

Imagine a rubber band stretched as far as it can go. If you hold it there for a long time, it starts to lose its stretch. A fully charged battery is a lot like that. Keeping it at 100% puts its inner parts under constant stress, causing it to wear out much faster than it should.

Thankfully, there’s a simple change you can make that has a huge impact.

Embrace the 20 to 80 Rule

The "20-80 rule" is the best piece of advice for anyone looking to preserve their laptop battery. The goal is simple: try to keep your battery's charge somewhere between 20% and 80%. This is the sweet spot where the battery is most comfortable and under the least amount of strain.

So, instead of waiting for the low-battery warning to send you rushing for a charger, plug it in when it gets close to 20%. On the other hand, unplugging it once it hits 80% makes a huge difference. You're simply avoiding the high-stress conditions of a completely full or totally empty battery.

The core idea is simple: smaller charges are much healthier for your battery than full ones. It might feel a little strange at first, but this small change to your routine can add years to your device's usable life.

The facts back this up over and over. Keeping your charge in that middle zone really pays off. A study by battery experts showed that batteries constantly charged to full and drained completely wore out much more quickly. In fact, batteries left plugged in at 100% saw a 20-30% faster drop in their ability to hold a charge over two years compared to those kept in the 20-80% range. You can learn more about these best practices for charging lithium-ion batteries in our detailed guide.

Why You Should Avoid Leaving It Plugged In All The Time

I get it. A lot of us use our laptops like desktop computers, so they stay plugged into the wall for days. Modern laptops have features to prevent "overcharging," but that doesn't solve the main problem. Holding the battery at that high-power 100% state speeds up its aging process, permanently reducing how much charge it can hold.

A great habit to get into is just unplugging your machine when you're done for the day. If you know you won't be using it for a few hours, unplug it. This simple act gives the battery a much-needed break from that high-stress state.

Automating Smart Charging with Built-In Tools

Let's be honest, nobody wants to watch their battery percentage all day. The good news is that most laptop makers know this is a problem and have started building tools right into their software to help you out.

Look in your system's power settings for anything that lets you set a maximum charge limit. It goes by a few different names, so here's what to look for:

  • Dell Laptops: Open the "Dell Power Manager" app and find the "Custom" battery setting. You can set your own charge limit, and they usually suggest a limit around 80% or 85%.
  • Lenovo Laptops: The "Lenovo Vantage" app has a great feature called "Conservation Mode." It stops the battery charge at around 60%, which is perfect for when you're plugged in for long periods.
  • HP Laptops: Many HP models have a "Battery Care Function" or something similar in the BIOS settings. This lets you set a hard limit on the maximum charge.
  • Apple MacBooks: macOS has a clever feature called "Optimized Battery Charging." It learns your daily routine and will often hold the charge at 80%, only filling it up right before it thinks you'll need it.

Turning on one of these settings is one of the easiest wins you can get. It puts the 20-80 rule on autopilot, taking all the guesswork out of it and keeping your laptop's battery healthy for a long time.

Why Charge Cycles and How Much You Drain Matter

Beyond the simple 20-80% rule, it's helpful to understand how your battery keeps track of its use. You've probably heard the term charge cycle, and it’s a key measure of your battery's lifespan. Think of it as your battery having a limited number of "lives" before it starts to get weaker and hold less charge.

So, what counts as one cycle? A single charge cycle is counted every time you use a total of 100% of your battery's power. The key word here is total. It doesn't have to happen all at once. For example, if you use 60% of your battery today, charge it, and then use another 40% tomorrow, you've completed one full cycle. If you're curious, you can find out how to check the number of charge cycles your battery has already been through.

This brings us to another idea: Depth of Discharge (DoD). It’s just a way of saying how much battery you use before you recharge. Running your laptop down to 10% is a deep discharge, while only using it until it hits, say, 60% before plugging it in is a shallow one.

Shallow vs. Deep Discharges

It turns out, your battery really doesn't like being pushed to its limits. It's much happier with smaller, more frequent sips of power than being drained dry and then filled up with a huge charge. Every time you run the battery way down, you're putting more stress on its inner parts, which causes it to wear out faster.

It's like the difference between running a marathon and going for a few short jogs during the week. Deep discharges are the marathon for your battery—very tough. Shallow discharges are the easy jogs that keep it healthy without the strain.

This isn't just a theory. A study of over 10,000 student laptops found that devices that were always charged with shallow discharges still had 80% of their original battery life after 500 charge cycles. In contrast, laptops that went through deep discharges hit that same 80% mark after only 350 cycles. That's a huge difference in lifespan from just a simple change in habit.

A Real-World Scenario

Let's see how this works in a typical day. Your laptop is at 80%.

  • Scenario A (Shallow Discharge): You work for a few hours, and by lunchtime, your battery is down to 50%. You plug it in while you eat, and it tops back up to 75%. This is a small, low-stress recharge.
  • Scenario B (Deep Discharge): You work all day on battery power, ignoring the warnings until it's barely alive at 10%. You finally plug it in, forcing it to do the hard work of a massive recharge from nearly empty.

Over time, making a habit of Scenario A will do wonders for your laptop's battery health.

This chart makes the point clear, showing how different charging styles affect your battery’s lifespan.

Bar chart comparing battery charging practices: 20-80% Rule, Full Charge, and Plugged In, with associated battery health impacts.

As you can see, sticking to that 20-80% sweet spot gives you a major advantage. Both constantly charging to full and leaving it plugged in all the time speed up wear and tear. The takeaway is simple: small, mindful changes to when you plug in and unplug have a powerful, combined effect on how long your battery will last.

Keeping Your Cool: Why Temperature Is Your Battery's Worst Enemy

It's not just your charging habits that decide how long your laptop battery will last. There's a silent killer that can completely ruin its lifespan: heat.

Think of your battery like an athlete. It performs best at a comfortable, normal temperature. Forcing it to work in extreme heat is like making that athlete run a marathon in the desert. It leads to quick exhaustion and, worse, permanent damage.

When a battery gets too hot, the chemical reactions inside speed up, but not in a good way. This causes permanent damage that reduces the battery's ability to hold a charge. This isn't a temporary problem that fixes itself once things cool down; the damage adds up over time.

You might be putting your laptop through this kind of stress without even realizing it. Leaving it in a hot car, using it in direct sunlight, or even just playing a demanding game can push the internal temperature into the danger zone.

A silver laptop on a black cooling stand rests on a wooden desk, with the text "KEEP IT COOL" at the bottom.

The Real-World Impact of High Temps

The data on heat damage is pretty serious. Consistently using or even just storing a laptop above 30°C (86°F) can seriously shorten its life.

One study found that a battery stored at 40°C for a single year lost a massive 25% of its total ability to hold a charge. Compare that to a battery kept at a more reasonable 25°C, which lost only 4% over the same time. Every degree matters. The warmer the environment, the faster your battery's limited lifespan is used up.

Simple Habits to Beat the Heat

The good news is that keeping your laptop cool doesn't require any special skills. It really just comes down to good habits and being aware of where you are.

Here are a few practical tips you can start using today:

  • Avoid Soft Surfaces: Please, stop using your laptop on your bed, couch, or a blanket. These surfaces completely block the air vents, trapping heat and forcing the fans to work harder. Stick to a hard, flat surface like a desk.
  • Give It Breathing Room: Keep the area around your laptop clear. Piling books or papers next to it can block airflow and cause heat to build up.
  • Dodge Direct Sunlight: The sun can turn your laptop's case into a little oven. If you're working outside or by a sunny window, find some shade.
  • Clean Your Vents: Dust is the enemy of cool. Every few months, a quick blast of compressed air into the vents can clear out lint and dust, making a huge difference in cooling.

The easiest win here? Get a laptop stand. Just lifting your device allows for 360-degree airflow underneath, which can lower its temperature by several degrees without any extra effort from you.

What About the Cold?

While heat is the main problem, extreme cold isn't great for your battery either. If you've ever left your laptop in a car overnight during winter, you might have noticed it has less charge or struggles to even turn on.

Luckily, this effect is mostly temporary. The cold simply slows down the chemical reactions, reducing the battery's ability to provide power. Once it warms back up to room temperature, performance should return to normal. The key is to let a cold laptop warm up slowly before you start using or charging it.

Ultimately, it’s all about keeping a stable, normal temperature. By making a few small changes to how and where you use your laptop, you can protect it from one of its most damaging enemies. You can dig deeper into the impact of temperature and charging rates on battery degradation in our dedicated article.

Smart Software Settings to Extend Battery Life

While good charging habits and temperature control are key, your laptop’s own software is your secret weapon for protecting its battery. Both Windows and macOS have powerful, built-in tools designed to manage power use. You just need to know where to find them and how to use them.

These settings do more than just make a single charge last longer—they actually reduce the total number of charge cycles your battery has to go through. Think of it this way: every little adjustment that saves power means one less time you need to grab the charger, which adds up to better long-term health.

Activate Your Built-In Power Saving Modes

The single most effective software change you can make is to turn on your operating system's power-saving mode. It’s a one-click action that automatically adjusts a whole bunch of settings to cut down on energy use when you’re unplugged.

These modes work by slowing down performance just a bit, pausing background apps, and dimming your screen. Honestly, for everyday tasks like writing emails or browsing the web, you probably won't even notice the difference. But your battery definitely will.

  • On Windows: Go to Settings > System > Power & battery and just turn on Battery saver. You can even set it to turn on automatically when your battery drops to a certain level, like 20%.
  • On macOS: Open System Settings > Battery and enable Low Power Mode. This is great because it cuts down the system's energy use whether you're plugged in or on battery power.

Here’s a look at the kind of power management options you'll find built right into your operating system.

This screenshot shows how you can choose between different power plans like "Balanced," "Power saver," and "High performance," giving you direct control over how much power your laptop is using.

Tweak Your Display and Background Apps

Your laptop’s screen is one of its most power-hungry parts. A simple adjustment here can make a huge difference. Just lowering your screen brightness from 100% down to around 70% can make your battery last noticeably longer without making you squint.

Besides the display, a lot of applications are quietly draining power in the background, even when you aren't actively using them. Luckily, both Windows and macOS give you the tools to find and manage these energy-draining apps.

A quick look at your system’s activity monitor can be a real eye-opener. You might find an app you haven't used in hours is still one of the top energy users, quietly syncing data or checking for updates in the background.

For example, on a Mac, you can open Activity Monitor and click the "Energy" tab to see a real-time list of which apps are using the most power. On Windows, the Task Manager gives you the same kind of information. If you see something you don’t need running, just close it.

Use Manufacturer-Specific Software for Advanced Control

Many laptop makers like Dell, Lenovo, and HP include their own power management software that offers more detailed control than the standard OS settings. These apps often come pre-installed and can be a big help for battery health.

The key feature to look for is a charge limit setting. This lets you stop the maximum charge at 80%, basically automating the 20-80 rule we talked about earlier. This is incredibly useful if you, like me, keep your laptop plugged in most of the time.

  • Dell Power Manager: Look for a "Custom" or "Primarily AC Use" setting.
  • Lenovo Vantage: You'll want to enable "Conservation Mode" to limit the charge.
  • HP Battery Health Manager: This is often found in the BIOS and lets you set a maximum charge level.

These clever systems stop the battery from sitting at a stressful 100% charge for hours. It's a bit like how smart energy recovery systems in electric cars work, using smart design to get the most out of the battery. By using these simple software settings, you can do something similar for your laptop, helping it stay healthier for a whole lot longer.

Dealing With a Laptop You Won't Use for a While

Sometimes, you need to put a laptop away for a few weeks or even months. A little bit of prep before you store it can be the difference between a healthy battery and a dead one when you finally turn it back on. It's just like getting a car ready for winter storage—you don't just park it and hope for the best.

The single most important thing you can do is get the battery charge to the right level. Storing a laptop with a 100% full or completely drained battery is a recipe for disaster, as both states put a ton of stress on the battery. The sweet spot is right around 50% charge. This is the most stable state for this type of battery, which slows down its aging process a lot.

Once you've hit that 50% mark, shut the laptop down completely. Don't just close the lid and let it sleep. Find a cool, dry place away from sunlight, like a closet or a desk drawer, and leave it there. Keep it out of attics, garages, or cars, where big temperature changes will do serious damage.

The Truth About Battery Calibration

You've probably heard people talk about "calibrating" a laptop battery. It sounds complicated, but it's really just a term for re-syncing the battery's internal sensor with what your computer thinks is happening. The good news? With modern laptops, you almost never need to do this. The sensors they come with are very accurate from the start.

Calibration doesn't magically fix old batteries or give you more runtime. All it does is make sure the percentage you see on your screen is a true reflection of the power you have left. The only time you should even think about it is if your laptop starts acting strangely—like suddenly dying when the battery meter still says it has 30% left.

If your battery percentage drains evenly and seems accurate, there's absolutely no benefit to calibrating it. In fact, you're just forcing an unnecessary full charge and drain on the battery, which adds to its wear and tear.

When—and How—to Calibrate the Right Way

So, you're seeing those weird, sudden shutdowns or big percentage drops. A calibration might be needed. It's a simple process, but it does take some time. You’re basically just running the battery through one complete charge cycle from full to empty.

Here’s how it works:

  1. Charge it up to 100%: Plug in your laptop and let it charge all the way to 100%. To be safe, leave it plugged in for another hour or two after it hits the top.
  2. Run it down completely: Unplug it and use your laptop normally until it shuts itself off from a dead battery.
  3. Give it a rest: Leave the laptop powered down and unplugged for at least three to five hours. This lets the battery settle.
  4. Charge it back up: Plug it in again and charge it all the way back to 100% in one go, without interruptions.

Once that's done, your laptop's software should have a much more accurate read on the battery's true state. But remember, this is a tool for fixing problems, not regular maintenance. If you feel you absolutely must do it, once a year is more than enough.

A Few Common Laptop Battery Questions

Even when you follow all the best advice, some specific questions always seem to pop up. Let's run through a few of the most common ones to clear up any confusion.

"Is It Really That Bad to Leave My Laptop Plugged In All the Time?"

In a word, yes. It's not the best thing for your battery's long-term health.

Modern laptops are smart enough to stop charging once they hit 100%, so you don't have to worry about "overcharging" like in the old days. The real problem is keeping the battery stuck at that 100% mark. This high-power state puts the battery's internal parts under constant stress, which makes it age much faster. Think of it like holding a muscle in a tensed position for hours—it just causes unnecessary strain.

If your laptop spends most of its life on a desk, your best bet is to use a built-in battery care feature to stop the charge at 80%. Most major brands like Dell, HP, and Lenovo have this. If yours doesn't, just get into the habit of unplugging it when it's charged and plugging it back in when it drops to around 40%.

"Do I Need to Calibrate My Laptop Battery? And How Often?"

Probably not. This is an older practice that doesn't really apply to modern batteries in the same way. Calibration doesn’t actually improve the battery's physical health; it just helps your computer give you a more accurate percentage reading.

It's like re-syncing a clock. It doesn't magically add more hours to the day, it just makes sure the time you see is correct.

You should only really think about doing it if you notice your battery behaving strangely, like suddenly dropping from 40% to 5% out of nowhere.

If your battery percentage seems to drain evenly, there's absolutely no benefit to calibrating it. In fact, calibration forces a full charge-and-drain cycle, which adds a little extra wear and tear for no real gain. If you feel you absolutely must, once or twice a year is more than enough.

"Will a Cheap Third-Party Replacement Battery Wreck My Laptop?"

It's a gamble, plain and simple. While you can find some decent third-party batteries out there, many are made with lower-quality parts and might be missing the important safety features that an official battery has. This could not only give you poor performance but also be a real risk to your device.

For peace of mind and the best performance, I always recommend getting a replacement directly from your laptop's maker.

If you do decide to take a chance on a third-party option, please stick to a well-known brand with a reputation for quality. Read the reviews carefully before you even think about buying.


For the ultimate control over your charging, a hardware solution like Chargie can automatically limit your charge to healthier levels, schedule top-ups when you need them, and protect your battery from overheating. You can learn more about how it works over at https://chargie.org.

How to Check Battery Health on Any Device

You probably know how to find the battery percentage on your screen, but that’s just a snapshot of today's charge. Knowing where to find the real health stats is key. For an iPhone, you can go right into Settings > Battery > Battery Health & Charging. On Android, it's a bit of a mix—some phones have it in the Settings app, but you might need a separate app. Laptops are a mixed bag too; Windows can create a very detailed report with a quick command, while macOS tucks it away neatly in System Settings.

If you just need to find the right screen quickly, here's a little cheat sheet.

Quick Guide to Finding Battery Health by Device

Device Type Built-in Method
iPhone/iPad Settings > Battery > Battery Health & Charging
Android Varies by maker; often in Settings > Battery (or use a separate app)
Windows Laptop Create a report using the powercfg /batteryreport command in Command Prompt
macOS Laptop System Settings > Battery > Battery Health

This table should get you to the right place, but the numbers you find there are what really matter.

Why Battery Health Is More Than Just a Percentage

Your device's battery is its lifeline, but just like the tires on a car, it wears down over time. The percentage you see at the top of your screen only tells you how much juice you have left for the day. True battery health, on the other hand, reveals how much charge the battery can hold in total compared to when it was brand new. This is a far more important number for understanding your device's long-term performance.

Smartphone with miniature tire on pavement symbolizing battery lifeline and mobile device maintenance

Think of it this way: a new phone with 100% battery health has a full-size gas tank. A year later, its health might drop to 85%, meaning the "tank" itself has physically shrunk. Even when your screen says "100% charged," you're actually starting the day with 15% less fuel than you used to. It's the reason an older phone seems to die so much faster, even after a full overnight charge.

Understanding the Key Numbers

To really get what's going on inside your device, you need to look past that simple icon on your screen. Two key things tell the real story:

  • Maximum Capacity: This is the most direct measure of health, shown as a percentage. It tells you the battery's current full charge ability compared to when it was brand new.
  • Cycle Count: This number tracks how many full charge-and-recharge cycles the battery has been through. It’s like an odometer for your battery.

A "cycle" isn't just charging from 0 to 100. It’s counted as you go. For instance, if you use 60% of your battery one day and then recharge, and use another 40% the next, that adds up to one full cycle. Most modern device batteries are built to stay healthy for about 300 to 500 charge cycles before they start to weaken seriously. You can learn more about why this number is so important in our detailed guide on what a battery cycle count is.

A good rule of thumb: once a battery's maximum capacity drops below 80%, it's often considered "worn out." At this point, you'll definitely notice shorter battery life, and you might also see performance slowdowns as the device struggles to get enough power for hard tasks.

Knowing these numbers gives you the power to take control. Instead of just guessing why your phone dies by 3 PM, you can check its health and make a smart decision about what to do next.

Checking Battery Health on Your iPhone or Android

Your phone is probably the most-used gadget you own, so its battery health is a pretty big deal for your day-to-day life. Thankfully, both Apple and Android give you ways to look under the hood and see how your battery is holding up.

For iPhone users, the process is very simple. For the Android crowd, it might take a little more digging, depending on who made your phone.

Two smartphones displaying battery status icons showing low and full charge levels on wooden table

Let's walk through how to find these numbers on your device so you can get a clear picture of its current condition.

Finding the Numbers on Your iPhone

Apple makes it incredibly easy to check your battery's status right from the settings menu. No extra apps needed—it's all built right in.

Just head over to Settings > Battery > Battery Health & Charging. Once you're there, you'll see a couple of key numbers that tell the whole story.

  • Maximum Capacity: This is the big one. It shows you how much charge your battery can hold compared to when it was brand new. A fresh-out-of-the-box iPhone will be at 100%, but this number will drop over time.
  • Peak Performance Capability: This little section lets you know if a worn-out battery is starting to slow down your phone. If everything is running smoothly, it'll say your battery is supporting normal peak performance.

If your capacity has taken a big hit, you might see a message about "performance management" being applied. That's just Apple's way of preventing your phone from shutting down unexpectedly by slowing its speed a bit. If you want to keep that capacity number high for as long as possible, some good iPhone battery-saving tips can make a real difference.

Keep a close eye on that Maximum Capacity percentage. Once it dips below 80%, Apple officially considers the battery "consumed." You'll definitely notice your phone doesn't last as long, and it’s probably a good time to think about a battery replacement.

Navigating Battery Health on Android Devices

Unlike the straightforward approach on iPhones, checking battery health on an Android can be a mixed bag. Some makers, like Samsung, have built-in tools, while others don't show you a specific health percentage at all.

If you have a Samsung phone, you can usually find this by going to Settings > Battery and device care > Diagnostics > Phone diagnostics and tapping on Battery status. It won't give you a percentage, but a simple "Life" reading like "Good" tells you the battery is still in decent shape.

But what if your phone doesn't have a built-in checker? Don't worry. You can grab a reliable app to get a much more detailed look. One of the best out there is AccuBattery.

Using AccuBattery for a Deeper Look

AccuBattery is a great app that watches your charging and usage habits to guess your battery's true health. It works by comparing the actual charge it measures against the battery's original design capacity.

Here’s what makes it so useful:

  1. Measures Real Capacity: After you've charged your phone a few times, the app calculates an estimated health percentage.
  2. Tracks Wear: It actually shows you how much "wear" each charge session puts on your battery, which is great for learning better charging habits.
  3. Provides Detailed Stats: You get a full screen with charging speeds, battery temperature, and how fast it's draining.

Using an app like this gives you the power to not just see your battery's current state but also understand how your daily habits are affecting its lifespan.

It’s easy to focus on your phone's battery health, but don't forget about your laptop. Its battery is the unsung hero of your productivity, and knowing its condition can save you from that dreaded "low battery" warning right in the middle of a big meeting.

Thankfully, both Windows and macOS have built-in ways to peek under the hood and see how your battery is holding up. Windows gives you a very detailed report, while Mac offers a quick, clean overview.

Digging Up the Battery Report on Windows

Windows has a great, slightly hidden feature that creates a full health report for your battery. It sounds a bit technical, but it's easy to do and the information you get is very valuable.

First, you need to open either Command Prompt or PowerShell. Just hit the Start button and search for either one. Once it's open, type in this little command: powercfg /batteryreport and press Enter.

That one command tells Windows to look through your battery's history and performance, then wrap it all up in a neat file. It will even tell you the exact file path where it saved the report, usually somewhere in your user folder.

Now, open that file. It might look like a lot of data, but you really only need to care about two numbers:

  • Design Capacity: Think of this as the battery’s original, brand-new maximum charge.
  • Full Charge Capacity: This is what it can hold now. It's totally normal for this number to go down over time as the battery gets older.

Just compare those two numbers. Let's say your laptop started with a Design Capacity of 50,000 mWh and its Full Charge Capacity is now 40,000 mWh. A little quick math tells you it's holding about 80% of its original charge. Simple as that.

When you see a big drop in the Full Charge Capacity, that's your clearest signal that the battery is on its way out. The report also gives you the cycle count and usage history, giving you a complete story of your battery's life so far.

Finding Battery Health on a Mac

Apple, in its usual style, makes checking your battery health very simple. It's built right into the system settings, no secret commands needed.

Just go to System Settings > Battery. You’ll see a little pop-up that shows the Battery Condition. Usually, it will just say "Normal." If you see "Service Recommended," however, that's Apple's polite way of saying your battery is getting tired and can't hold a charge like it used to.

If you want a few more details, click the little "i" icon next to the condition. This is where you'll find the good stuff:

  • Maximum Capacity: This is the same as on an iPhone. It’s a simple percentage showing how much charge your battery can hold compared to when it was brand new.
  • Cycle Count: This number tracks how many full charge-and-recharge cycles the battery has gone through. For most MacBooks, Apple designs the batteries to keep up to 80% of their capacity after 1,000 cycles.

Keeping an eye on these numbers helps you stay ahead of the game and know when you might need to think about a replacement. For some real, practical advice on making that battery last as long as possible, check out our guide on how to extend laptop battery life. Once you understand what these numbers mean, you're in a much better position to keep your machine running strong.

Decoding Your Battery Health Report

https://www.youtube.com/embed/Q8Cu_-yXlEk

Alright, so you've run the tests and now you're staring at a screen full of numbers. What does it all actually mean for your device day-to-day? Let's break down these stats into something you can actually use.

The two big players you need to understand are Maximum Capacity and Cycle Count. Think of them as the vital signs for your battery. They tell you just about everything you need to know about its current state and what to expect down the road.

What Is Maximum Capacity

Maximum Capacity is probably the easiest number to understand. It's a simple percentage that tells you how much juice your battery can hold today compared to the day it was made.

If your report says 90%, it means your battery now only holds 90% of the energy it could when it was fresh out of the box. A little bit of aging is perfectly normal, but there's a specific number you really want to keep an eye on.

Most makers, including Apple, consider a battery to be seriously worn out once its Maximum Capacity drops below 80%. When this happens, it's not just about shorter battery life. Your device might actually start to feel sluggish because the aging battery can't supply enough power for demanding apps or tasks.

Find yourself constantly looking for an outlet? Does your phone ever just die out of nowhere, even when it says it has 20% left? A low Maximum Capacity is almost always the reason why.

This little workflow shows just how simple it is to get these reports on your laptop.

Workflow diagram showing data transfer from Windows through Report validation to Mac system

As you can see, whether you're working on a Windows machine or a Mac, you're only a few clicks away from getting a detailed look at your battery's health.

Why Cycle Count Matters

Next up is Cycle Count. This is basically the odometer for your battery. It keeps a running tally of how many times you've used and recharged the total of 100% of your battery's capacity.

Now, a "cycle" isn't just charging from 0 to 100. It's added up over time. For instance, if you use 50% of your battery today, plug it in overnight, and then use another 50% tomorrow, that adds up to one full cycle.

Here's why this number is so important:

  • It’s a measure of physical wear: Every single charge and discharge cycle causes a tiny, permanent amount of wear and tear on the battery's insides.
  • It helps predict the future: Most modern phone and laptop batteries are made to keep at least 80% of their original capacity for around 500 cycles. A high cycle count is one of the strongest clues that your battery is getting old.

Keeping an eye on battery health is becoming a big deal, extending far beyond our personal gadgets. The market for EV battery health tools was valued at a whopping USD 2.2 billion in 2024 and is set to grow rapidly, partly because new rules will require electric vehicles to display this info. For anyone curious about how these reports work in the car world, it's worth reading up on the truth about battery health reports on used EVs.

Simple Habits to Extend Your Battery Lifespan

Person placing smartphone on wireless charging pad with power bank and cable on wooden desk

Okay, so you know your battery's health stats. That's the first step. But the real goal is making that battery last as long as possible.

The good news? You don't need to be a tech expert to slow down battery wear. A few small, consistent habits can make a huge difference, keeping your device running smoothly for years and saving you a trip to the repair shop.

It's all about reducing the stress on the battery. Over time, this gentler approach pays off by keeping your maximum capacity from dropping too fast.

Avoid Extreme Temperatures

One of the biggest enemies of any battery is extreme temperature—we're talking both blistering heat and freezing cold. Ever left your phone on the car dashboard on a sunny day? Or used it outside in the dead of winter? That puts a lot of stress on its internal parts and can permanently damage its ability to hold a charge.

Think of it this way: high heat is like forcing your battery to run a marathon it didn't train for, while a deep freeze makes its insides sluggish.

  • Heat: Anything over 95°F (35°C) can permanently weaken your battery's capacity.
  • Cold: Using your device in freezing temps can temporarily zap your battery life, though it's usually less damaging long-term than heat.

The sweet spot for most devices is somewhere between 62°F and 72°F (16°C to 22°C). Just being mindful of where you leave your gear can have a surprisingly big impact.

Master the 20-80 Rule

Forget what you might have heard about old-school batteries. You shouldn't always charge your modern devices to 100% or let them drain to empty. Today's batteries are happiest when they’re kept somewhere in the middle of their charge range. Constantly pushing them to the absolute limits—full or empty—is just asking for trouble.

This is where the 20-80 rule comes in. Try to keep your battery level between 20% and 80% as much as you can. It's one of the single most effective things you can do. Plug in when it gets low, but unplug it before it hits the top. This is exactly what smart charging tools like Chargie were built for—they can handle the whole process so you don't even have to think about it.

Leaving a device plugged in overnight to sit at 100% is particularly bad. It keeps the battery in a high-stress state for hours, which speeds up its aging. Your phone's built-in "Optimized Charging" feature is a good start, but actively managing the charge levels yourself is even better.

This isn't just a trick for phones; it's a key idea in industries that depend on long-lasting batteries. Take the electric vehicle world. A recent study of 10,000 EVs revealed that modern batteries now weaken at only 1.8% per year on average—a big improvement from 2.3% just a few years ago. You can dig into the data yourself in this EV battery health research. By adopting the same smart habits, you can give your personal devices a much longer, healthier life.

Common Questions About Battery Health

Even after digging into your battery’s stats, you probably have a few questions floating around. Let's tackle some of the most common ones, so you can get a clearer picture of what's really going on inside your device.

Getting a handle on these details helps you make smarter calls, like knowing when it's truly time for a replacement versus just dealing with a software issue.

When Should I Get a New Battery?

The magic number for most companies is 80% maximum capacity. Once your battery health drops below this point, it’s officially considered worn out. You’ll definitely notice it doesn't last as long, but other weird issues can start popping up, too.

Keep an eye out for these tell-tale signs:

  • Sudden shutdowns, even when the battery meter says you have plenty of juice left.
  • Noticeable slowness when you're opening apps or switching between them.
  • The device feels surprisingly warm to the touch, even when you're not doing anything intense.

If your main complaint is that your phone isn't charging as fast as it used to, that's not always a battery health problem. Sometimes, the issue is the charging process itself. If that sounds familiar, it's worth taking a moment to troubleshoot slow phone charging just to rule out other causes.

Can Battery Health Go Back Up?

I get this question all the time, and the short answer is no. The wear and tear on a battery is a physical process that you just can't reverse. Once that capacity is gone, it’s gone for good.

So, why do people sometimes see their battery health percentage tick up a point or two? It almost always comes down to the software re-checking its numbers. Your phone’s operating system is constantly estimating the battery’s health. After a software update or a full charge-and-drain cycle, it sometimes corrects its own math, resulting in a more accurate—and occasionally higher—reading.

Think of it like adjusting the fuel gauge in your car, not magically adding more gas to the tank. The reading changed, but the actual size of your tank (your battery's real-world capacity) hasn't grown.

Are Third-Party Battery Apps Safe?

For the most part, yes—but you have to stick with well-known apps. Apps like AccuBattery on Android have been around for years, are highly trusted, and give you a ton of useful data without asking for strange permissions.

When you're picking an app, look for a high number of positive reviews and a clear, easy-to-find privacy policy. A good battery app simply reads the data your device is already collecting; it has no business asking for access to your contacts or photos. They're a great way to check battery health on devices that don't give you deep-dive stats out of the box.


Extending your battery's life means fewer replacements and less e-waste. Chargie is a smart device designed to do just that by preventing the damaging effects of overnight charging. It intelligently manages your device's charge levels, which can extend its lifespan by up to four times. Join over 50,000 users and protect your battery at https://chargie.org.

Chargie is a smart charging device designed to extend the lifespan of your phone's battery by limiting overnight charging.

Company

Lighty Electronics SRL
42 Viorelelor st
305500 Lugoj, Romania

EU VAT: RO35245011

© 2019-2026 Lighty Electronics SRL. All Rights Reserved.

Add to cart