How to Fix a Broken Charger Port: A Simple Guide
We've all been there. That dreaded moment when you plug in your phone, and… nothing. The little charging icon doesn't show up, and the battery percentage stubbornly refuses to climb. Before you panic and start Googling "phone repair near me," take a breath. Most of the time, the fix is way simpler and cheaper than you think.
Believe it or not, these basic checks solve the problem more than 70% of the time, no technical skills required.
What to Do When Your Device Stops Charging
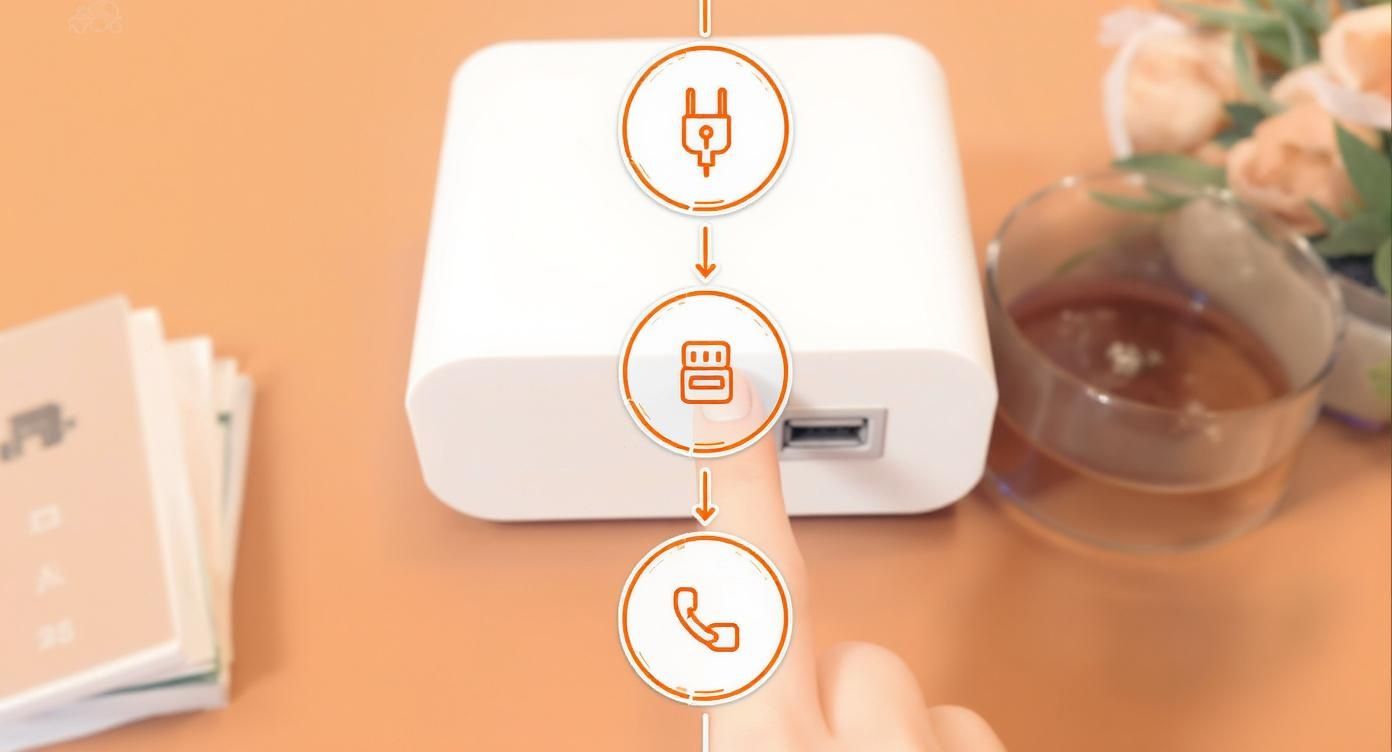
So, your phone, tablet, or laptop is giving you the silent treatment when you plug it in. What's the first move? Don't assume the worst. The port itself is usually the last thing to fail.
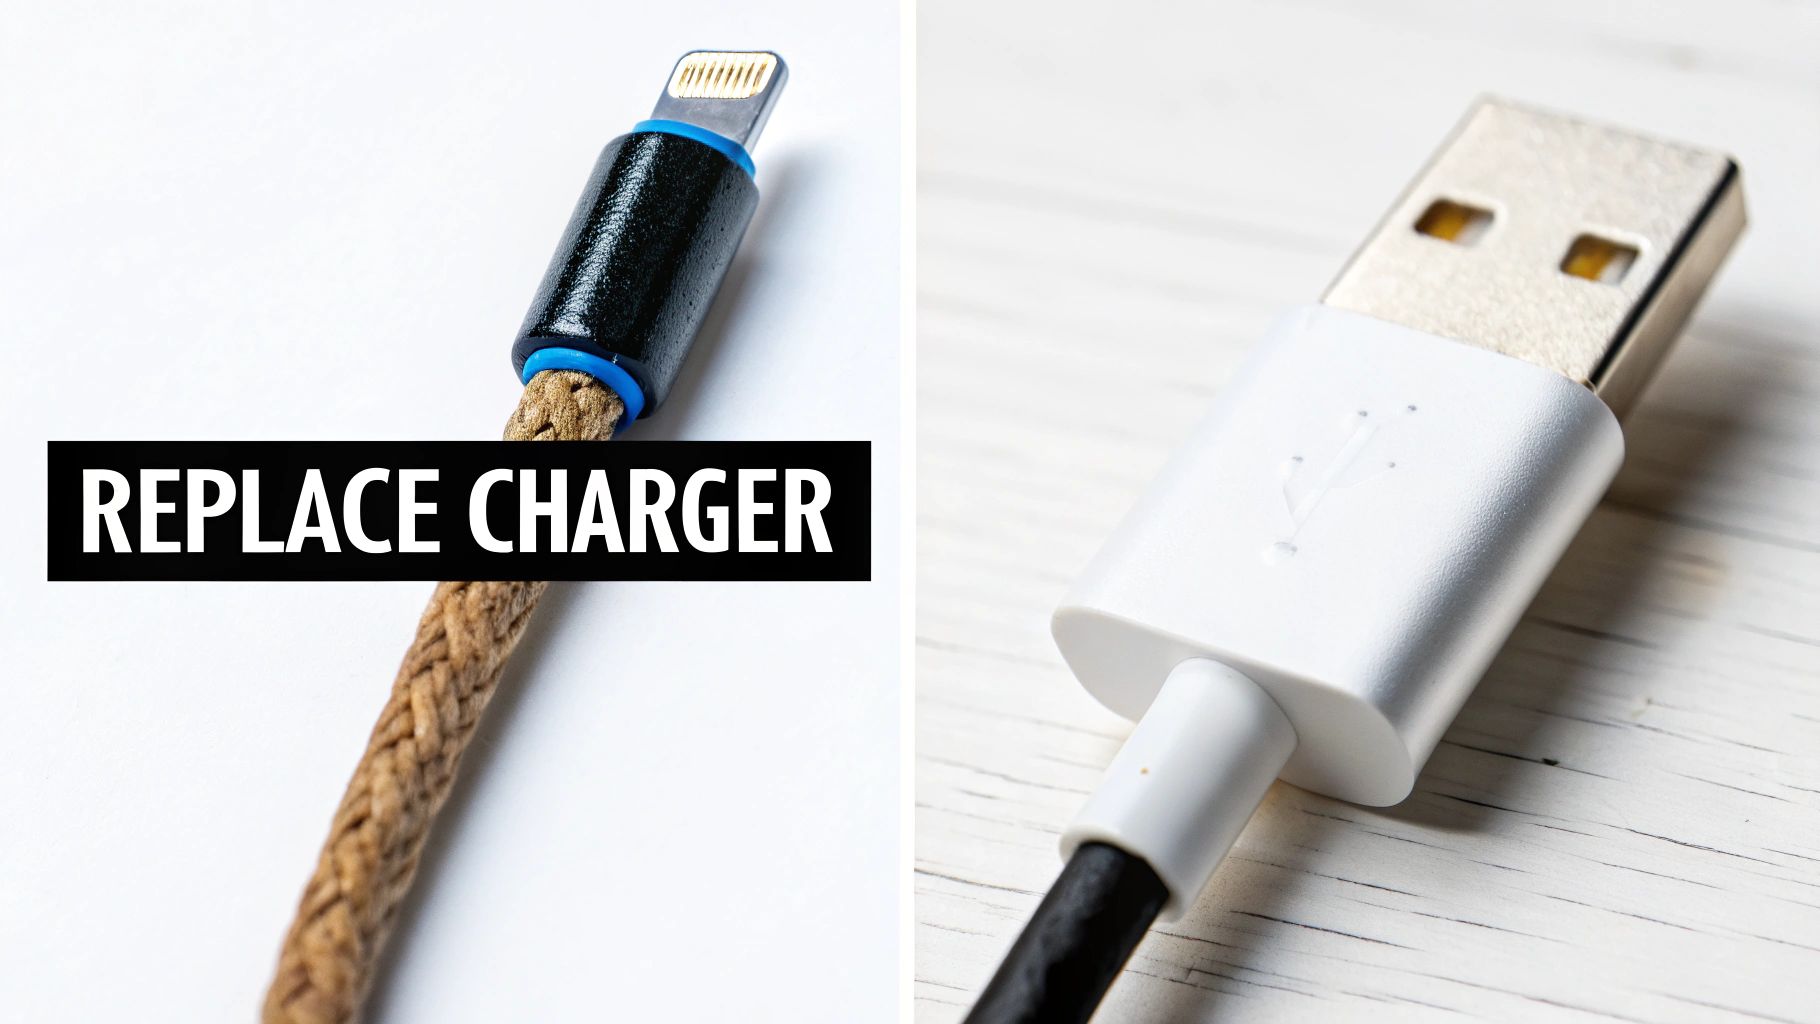
Start with the easy stuff. Grab a different charging cable and wall plug that you know are working. Borrow one from a family member, or one from another device. If your gadget suddenly springs to life and starts charging, you’ve found your culprit. Cables and power bricks lead a hard life and break far more often than the ports they plug into.
Rule Out Software Glitches
Still no luck with a new cable? Don't give up just yet. The issue might not be physical at all. Sometimes, a simple software hiccup is all it takes to throw off the charging process.
The fix is as easy as it gets: a full restart. Power your device completely down, let it sit for a minute, and then turn it back on. This quick reboot forces the device's software to reset and can often clear up whatever was causing the charging jam. It’s a surprisingly effective trick that many people skip right over.
Inspect the Port for Obvious Issues
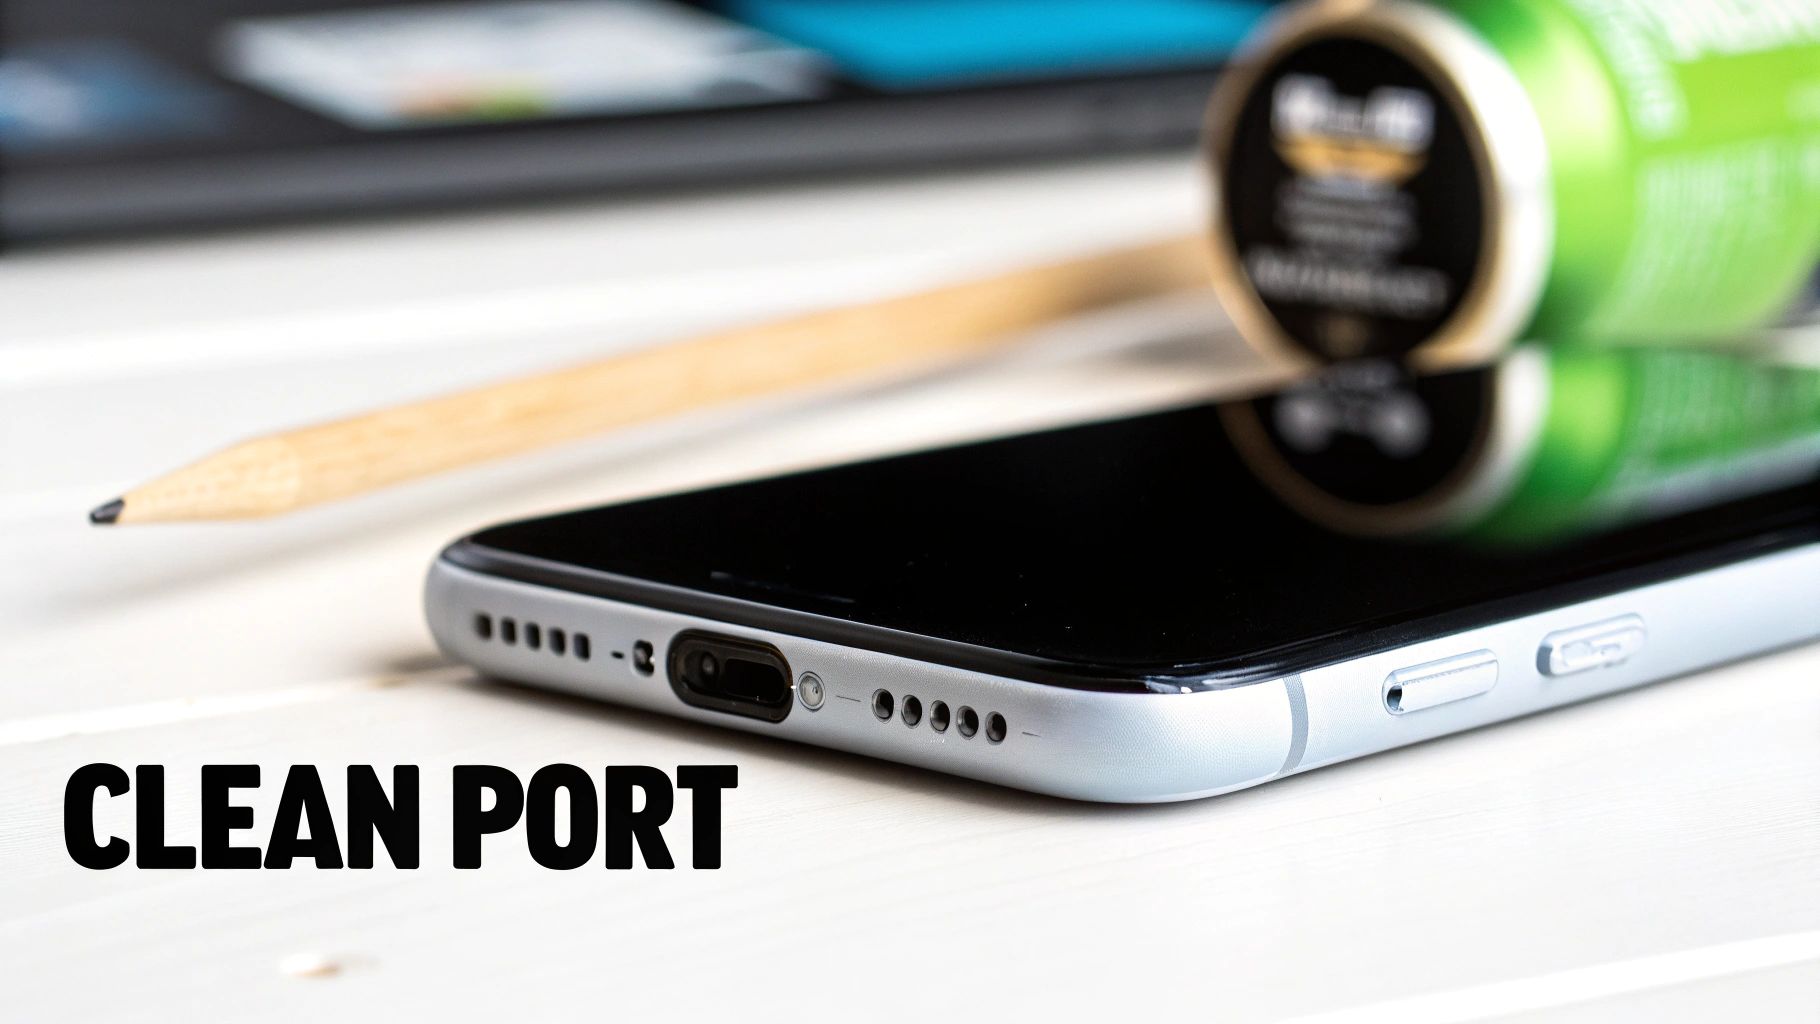
Alright, now it’s time to play detective. Grab a flashlight and get a good, close look inside the charging port. What do you see? It's amazing how much pocket lint, dust, and other gunk can get crammed in there over time. These ports are basically tiny vacuums for whatever is in your pocket or bag.
While you're looking, check for any bent or damaged pins. Those little metal contacts inside the port are delicate, and if one gets bent out of shape or broken, it can't make a solid connection. If the port looks clean and the pins seem straight, you can move on. But if you see obvious physical damage, that’s a pretty clear sign a more hands-on repair is in your future.
This visual guide breaks down these first crucial troubleshooting steps.
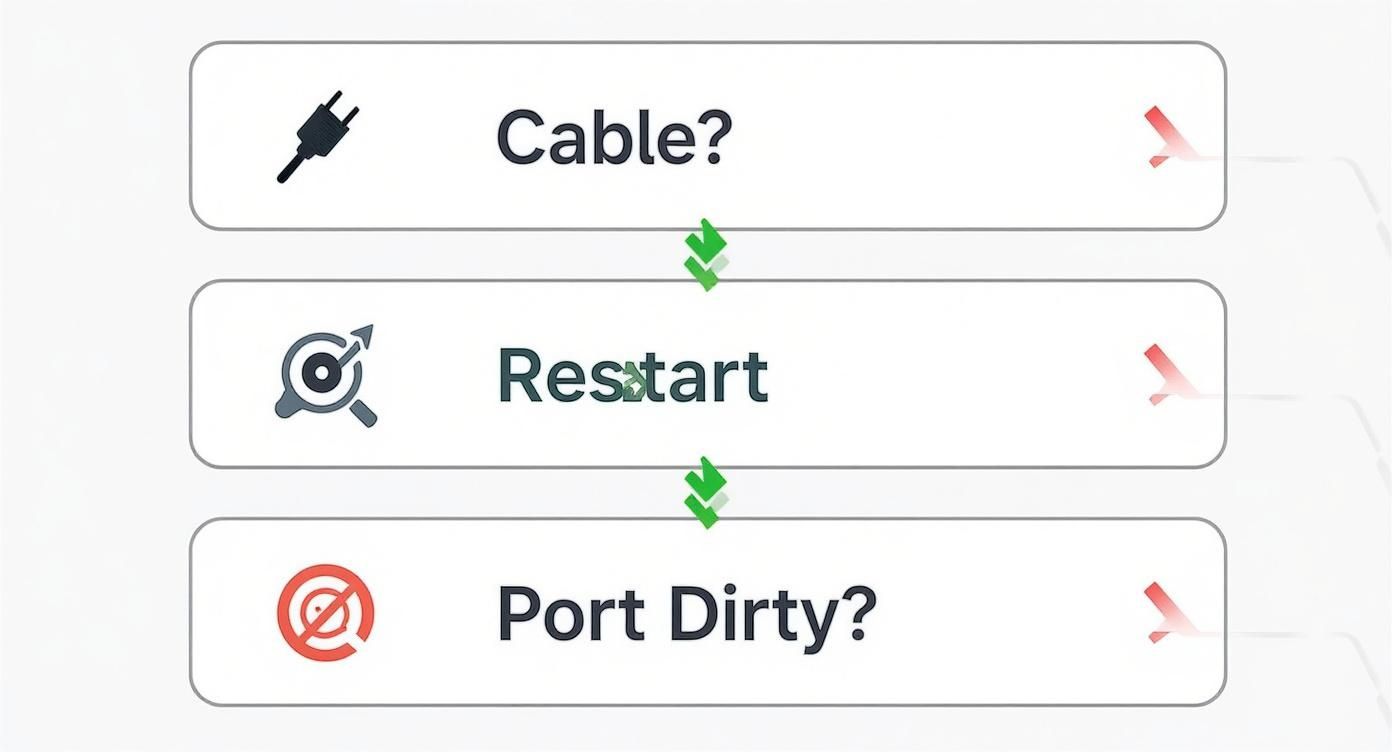
Walking through this logical process—cable, software, then a physical look—is the most efficient way to figure out what's really going on.
If you’ve gone through these steps and determined the problem lies with your accessories, our guide on what to do when your charger is not working can give you some more detailed pointers. By ruling out the easy stuff first, you'll know for sure whether the charger port itself is the real problem.
Safely Cleaning Debris from Your Charging Port
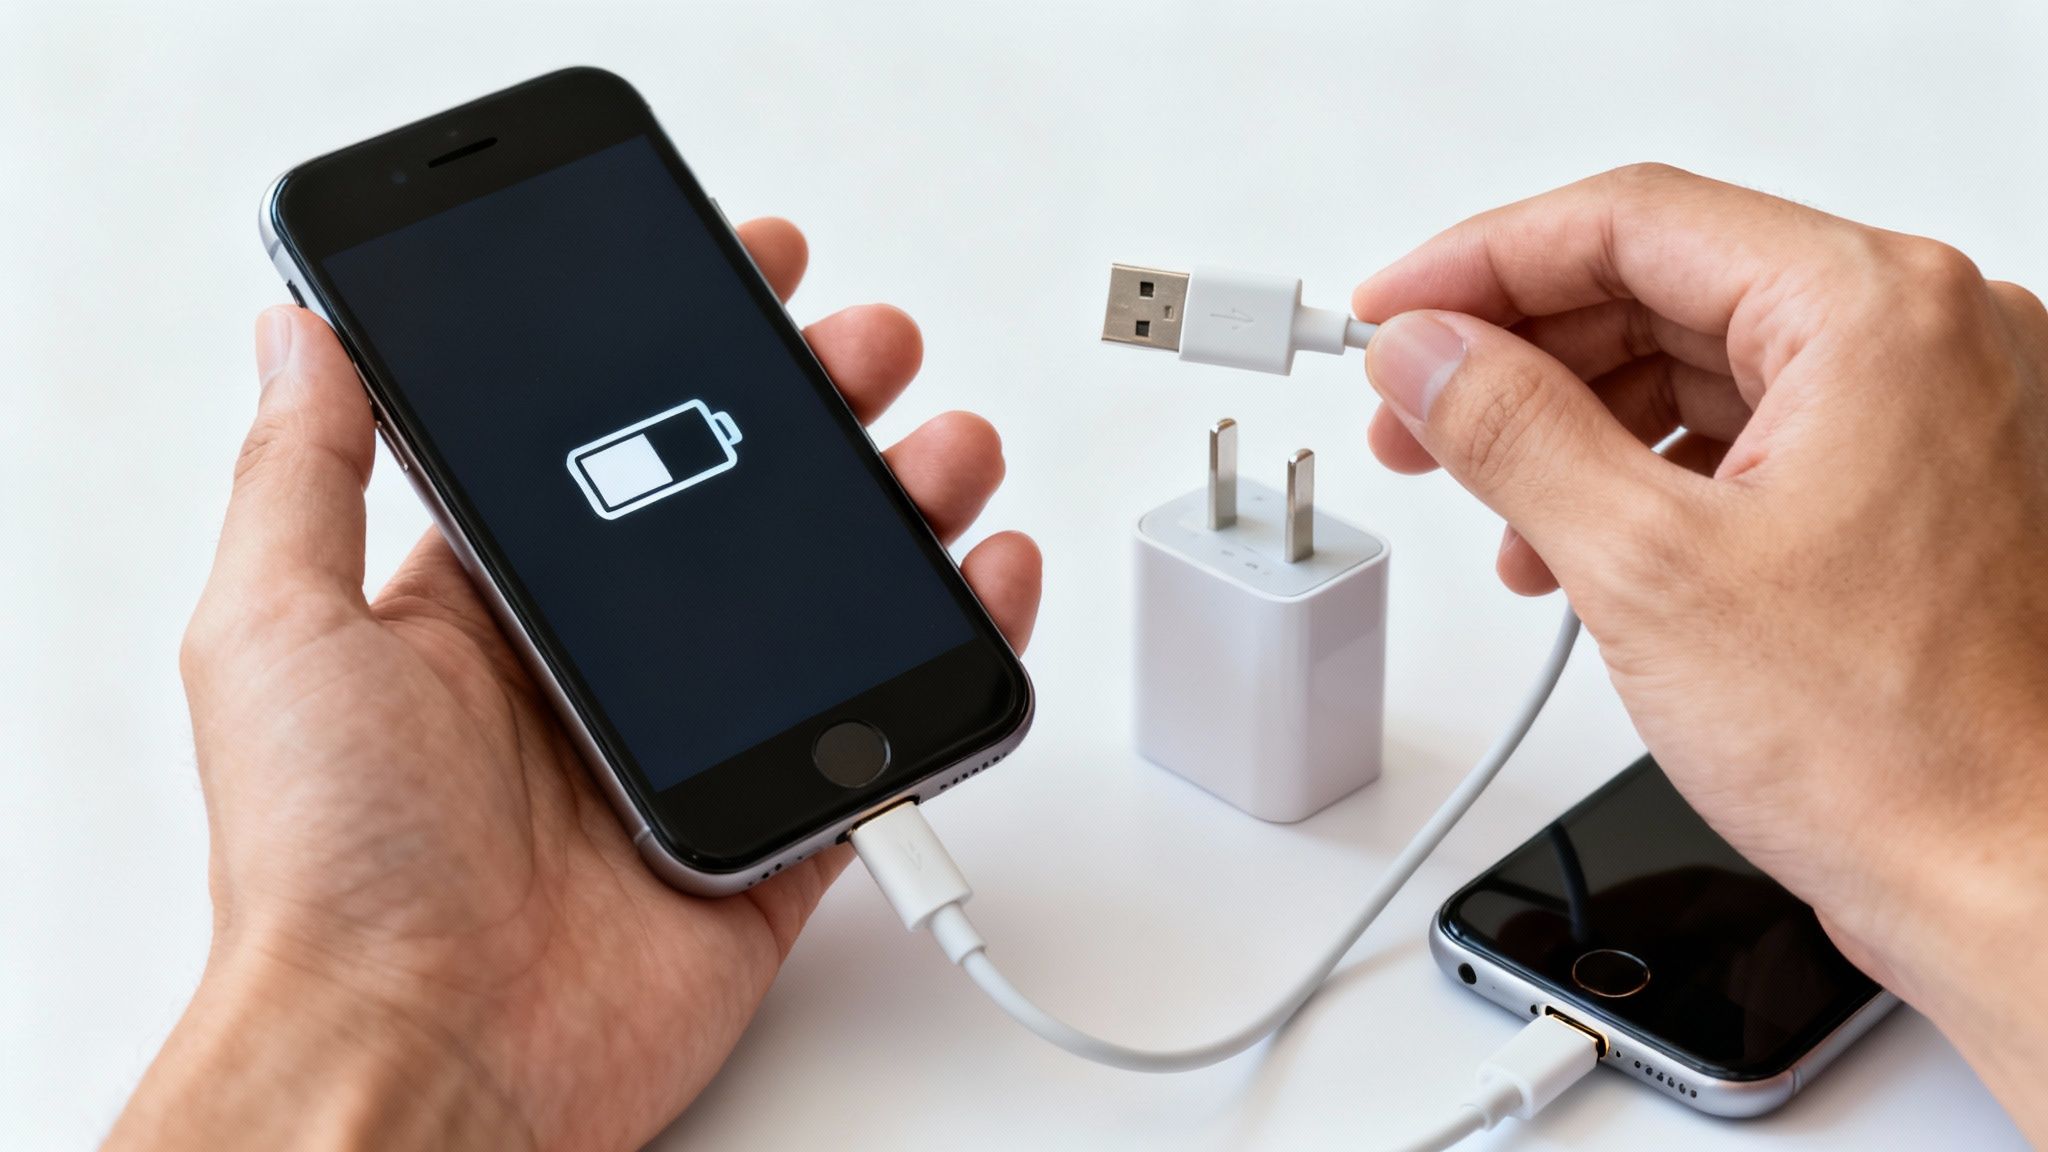
It’s an incredibly common scenario: you plug your phone in, and nothing happens. Before you panic and assume the port is fried, consider a much more likely culprit. Over time, your charging port becomes a magnet for pocket lint, dust, and all sorts of tiny gunk. It gets packed in there so tightly that the cable can't make a solid connection anymore.
The good news? A careful cleaning is often all it takes to bring a "broken" port back to life. But I have to stress the word careful. The inside of that port is delicate, and grabbing the wrong tool can quickly turn a simple fix into a much bigger, more expensive problem.
Gathering the Right Tools for the Job
Your mission is to gently remove the debris without scratching or shorting out the sensitive electronics inside. That means you need to resist the urge to grab the nearest pointy metal object. I’m looking at you, paperclips and safety pins.
Metal conducts electricity and is very hard—a terrible combination for this job. You could easily cause a short circuit or permanently bend the contact pins, landing you right where you didn't want to be: needing a professional replacement.
Instead, you want to stick with things that don't conduct electricity and are softer. Here's your go-to toolkit:
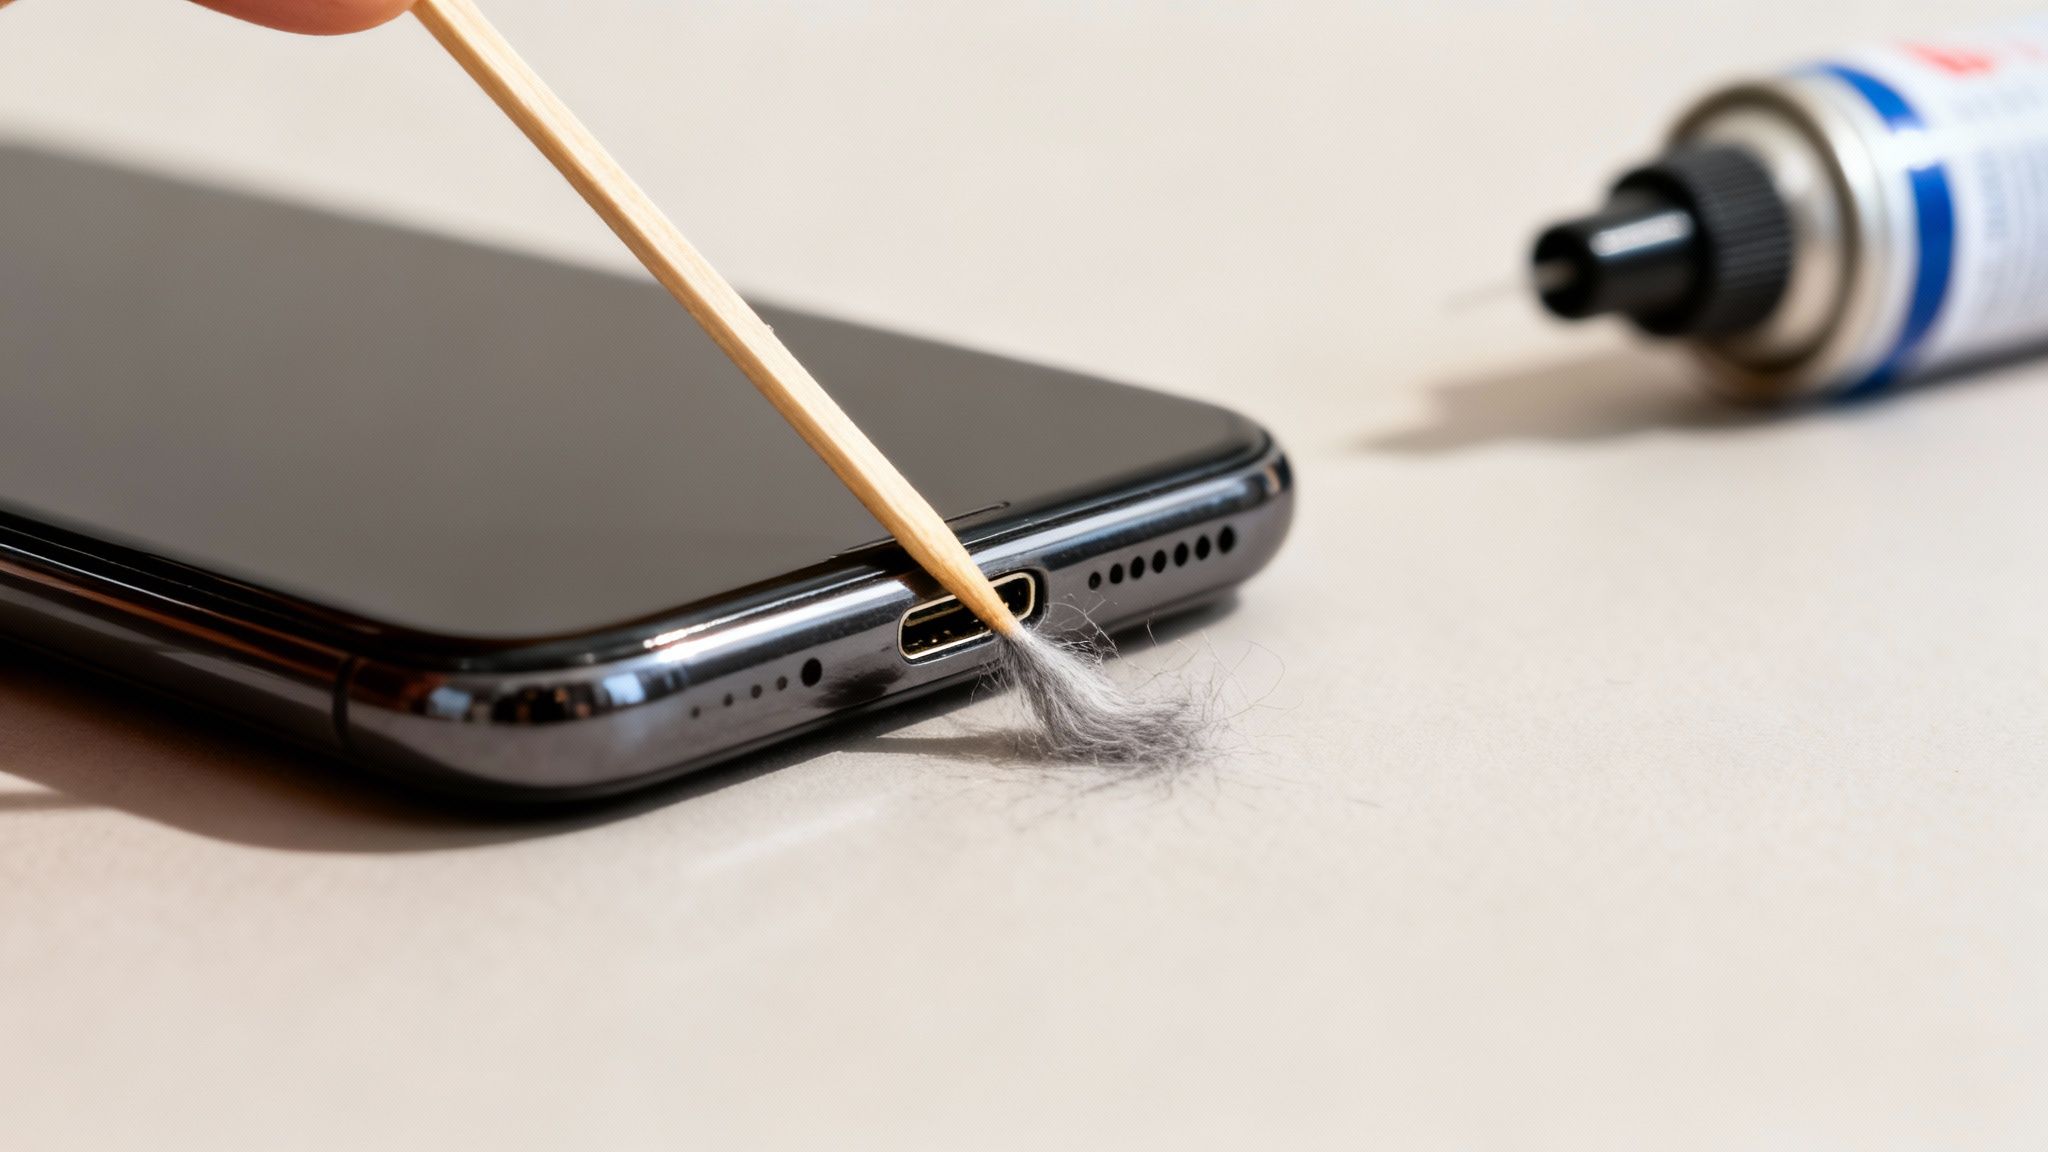
- A Wooden or Plastic Toothpick: This is your main tool for gently scraping out the packed-in gunk. Wood or plastic is soft enough not to damage the delicate metal contacts.
- A Can of Compressed Air: Perfect for blasting out loose dust before and after you get in there with the toothpick. Just remember to use short, sharp bursts.
- A Small, Soft-Bristled Brush: A clean, dry toothbrush or a special anti-static brush is great for sweeping away any fine particles left behind.
Crucial Safety Tip: Before you even think about sticking anything in that port, power your device completely off. This is a must. It eliminates any risk of a short circuit, even when you're using the right tools. It's a simple step that could save your device.
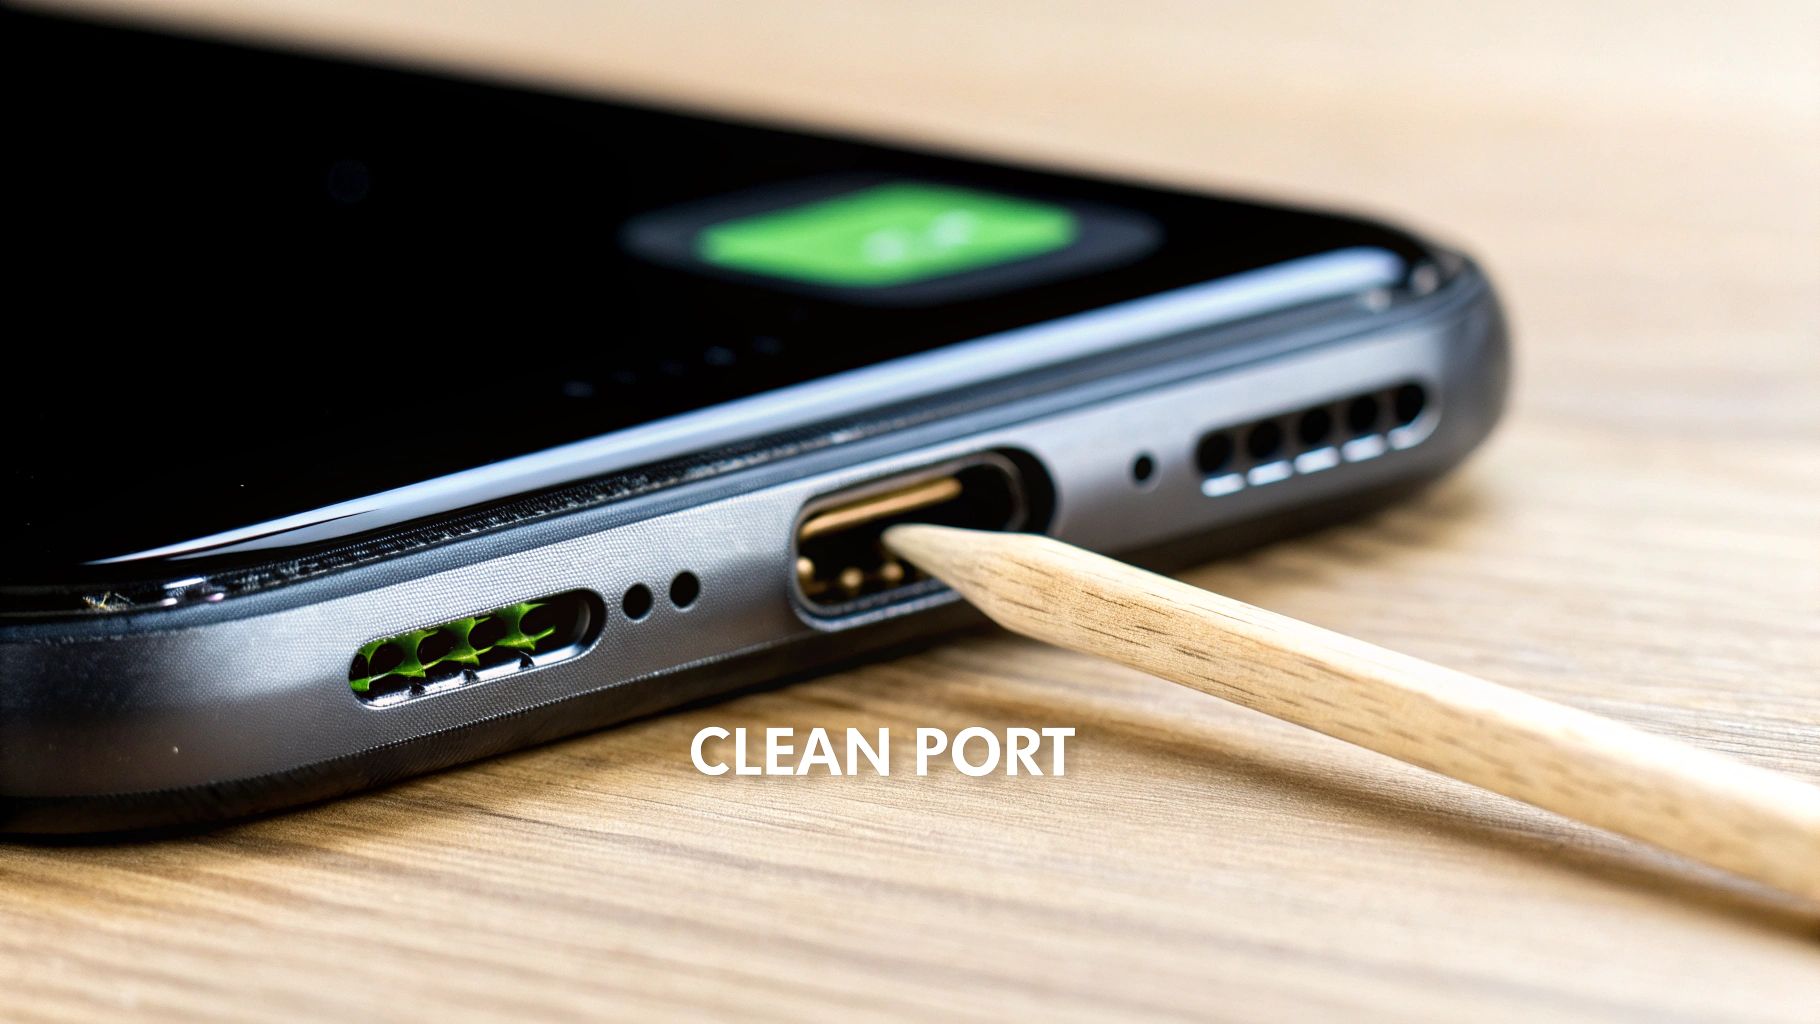
The Gentle Cleaning Process
With your device powered down, find a spot with good lighting. Use a flashlight to peek inside the port—you might be surprised by what you see. This quick look helps you see where the gunk is.
First, grab the compressed air. Hold the can upright a few inches away and give the port a couple of quick blasts. This will clear out any loose stuff sitting on the surface and prevent you from accidentally pushing it deeper.
Now, take your wooden toothpick and gently slide it into the port. Your goal is to carefully trace the inside walls, scooping the debris out, not pushing it in. Think of it less like digging and more like a gentle sweeping motion. Work your way around the edges, and you'll probably pull out a shocking amount of lint.
Once you’ve pulled out the main clumps, give it another quick blast of compressed air to get rid of anything you loosened up. For a final polish, a gentle sweep with a dry, soft-bristled brush will take care of any lingering dust.
If you want a more detailed look at different techniques, there are some great guides out there on effective charging port cleaning.
Now for the moment of truth. Power your device back on and plug in the charger. Chances are, you'll see that familiar charging icon pop right up.
DIY Cleaning Toolkit: What to Use and What to Avoid
To make it even clearer, here’s a quick reference guide for what you should—and shouldn't—be using to clean out your charging port.
| Tool | Recommended Use | Why it's Safe (or Unsafe) |
|---|---|---|
| Wooden/Plastic Toothpick | Gently scraping out packed-in debris. | Doesn't conduct electricity and is soft enough not to scratch internal pins. |
| Canned Compressed Air | Blowing out loose dust and particles. | Touch-free and effective, but must be used in short bursts. |
| Soft, Dry Brush | Sweeping away fine dust after cleaning. | Soft bristles won't damage delicate parts. |
| Metal Paperclip/Pin | Never use. | Unsafe: Conducts electricity, can cause short circuits and permanently scratch/bend pins. |
| Your Breath | Avoid. | Unsafe: Contains moisture that can lead to rust and damage electronics. |
| Water or Alcohol | Never use. | Unsafe: Liquids can seep inside and cause irreversible water damage. |
Sticking to the safe tools on this list is the best way to ensure your DIY cleaning session is a success, not a disaster.
Deciding on Your Repair Options and Costs
If a good, thorough cleaning didn't bring your device back to life, the problem is almost certainly deeper—something is physically broken inside the port. From here, you’re looking at three main paths, and the right one for you comes down to your budget, how fast you need your device back, and your comfort level with taking things apart.
Your choices are pretty straightforward: go to an authorized service center (like the Apple Store), find a local third-party repair shop, or try to fix it yourself. Knowing the real-world differences between them is the key to making a smart call that doesn't waste your time or money.
Authorized Service Centers: The Official Route
Taking your device back to the manufacturer or one of their certified partners is always seen as the safest play. They use genuine, official parts, meaning the new port is a perfect match for the old one. The technicians are specially trained, and you’ll usually get a warranty on the repair work itself, which is great for peace of mind.
Of course, that quality and assurance come with a bigger price tag. Authorized repairs are almost always the most expensive option. You might also have to wait longer if your device has to be mailed out to a central repair location.
Still, if your device is under its original warranty, this is the only path to take. Going anywhere else will likely cancel it.
Local Third-Party Repair Shops: The Sweet Spot of Cost and Convenience
For most people with devices no longer under warranty, a good independent repair shop is the answer. They're almost always cheaper than the official centers and can often finish the repair the same day—sometimes in just an hour or two. That speed is a lifesaver when you can't be without your phone or laptop.
The main trade-off is with the parts and the skill of the person doing the repair. Many shops use high-quality parts that work just fine, but they aren't "official." That’s why it’s so important to pick a shop with a solid reputation and plenty of good reviews. Always ask about their warranty on repairs; any decent shop will stand by their work.
Key Takeaway: The quality of local shops varies wildly. Hunt for businesses with a proven track record, glowing customer reviews, and clear, upfront pricing. A good local tech is a valuable person to know.
When figuring out how to fix a broken charger port, cost is obviously a massive factor. Prices can swing dramatically depending on your device and where you take it. Third-party shops typically charge somewhere between $40 and $150. Cheaper Android phones will be on the low end, while top iPhones or Samsung Galaxy models push the higher end. For those same premium phones, an authorized service center can easily run you $100 to $250. Laptops and tablets can climb even higher, sometimes topping $250 for a professional fix. You can find a more detailed cost breakdown over at computeremergencyroom.com.
The DIY Approach: For the Brave and the Skilled
Your final option is to roll up your sleeves and do it yourself. You can find DIY kits online for $20 to $50 that come with the replacement part and some basic tools. It's by far the cheapest way to go, but it also carries by far the most risk.
Modern gadgets are incredibly dense and delicate. Swapping a charging port often requires special tools, a steady hand, and sometimes even tiny soldering skills—the kind of work done with small parts under a microscope.
Before you even think about ordering a kit, ask yourself this:
- Is it Soldered or a Flex Cable? Some ports are on a simple ribbon cable that's relatively easy to unplug and replace. Others are soldered directly to the main circuit board, which is a job for an expert.
- What's the Risk of More Damage? One tiny slip with a hot soldering iron can fry the main board, turning a simple fix into a dead device. It happens all the time.
- Who Helps You If It Goes Wrong? When you do it yourself, there's no warranty. If you mess it up, you’re on your own.
Honestly, unless you have real experience with electronics repair and have the right gear, the DIY route is a bad idea for something as vital as a charging port. The potential savings just aren't worth the very real risk of causing permanent, expensive damage.
When to Call in a Professional
Knowing your limits is a skill, especially when you’re dealing with the insides of modern electronics. While a good cleaning can solve a surprising number of charging issues, there are definite red flags that mean it's time to put the tools down and call a pro. Pushing forward when you're in over your head is the fastest way to turn a small, fixable problem into a much bigger, more expensive one.
One of the biggest tell-tale signs is a physical one. If you plug in your cable and the port itself feels loose, wobbly, or shifts around inside the frame, that’s a major warning. It means the parts holding the port in place have broken, and it’s no longer securely connected to the main circuit board. No amount of cleaning is going to fix a physically broken mount.
Likewise, if you see any signs of that greenish or whitish crusty buildup, you're likely dealing with rust from water damage. Trying to fix this yourself without the right equipment can easily cause further short circuits and fry the board.
The Dangers of DIY on Soldered Ports
The real game-changer in modern device repair is how the charging port is attached. In older gadgets, the port was often on a separate, flexible cable that you could unplug and replace with relative ease. Those days are pretty much over.
Today, most charging ports are soldered directly onto the main circuit board (or motherboard). This is the brain of your device, and the connections are microscopic. Replacing a soldered port isn't a simple swap; it requires special tools and an incredibly steady hand.
Here’s a peek into what a technician's workbench looks like for this kind of job:
- Hot Air Rework Station: To melt the old solder without cooking the tiny parts nearby.
- Microscope: Because the solder points are often completely invisible to the naked eye.
- Precision Soldering Iron: For applying new solder with pinpoint accuracy.
- Anti-Static Equipment: To prevent an accidental static shock from killing the entire board.
Trying this at home with a standard soldering iron from the hardware store is a recipe for absolute disaster. You can easily overheat the board, damage the delicate connection points, or create a solder "bridge" that shorts out important parts. A failed DIY attempt on a soldered port can permanently destroy the main board, turning an inexpensive port repair into a bill for a whole new device.
Why Professional Repair Is Often the Smarter Choice
Charging port repair is one of the most common—and most technically demanding—jobs a technician sees. While the replacement part itself might only cost a few dollars, what you're really paying for is the technician’s skill and expensive equipment. They have the experience to spot related issues, like a battery that might have been stressed by the faulty port.
Expert Insight: A damaged charging port can indirectly wreck your battery by feeding it an inconsistent power flow. A good technician will often test the battery's health during a port repair to head off future problems like bulging or reduced battery life, ensuring a truly complete fix.
If you're facing a complex issue or just aren't comfortable attempting a DIY fix, finding a service that specializes in professional battery charging port repair is your best bet. The cost is a small price to pay for the peace of mind that the job is done right, without risking the life of your entire device.
While you're waiting for a repair, a temporary workaround can be a lifesaver. Check out our guide on how to use a power bank to keep your device up and running in the meantime.
You’ve gone through the hassle of fixing your charging port—the last thing you want is a repeat performance. Keeping that tiny port healthy is all about small, consistent habits. Think of it as preventative care for your phone, tablet, or laptop.
These little adjustments can make a huge difference, saving you from future headaches and repair bills. After all, the charging port is a high-traffic area for your device. Every time you plug and unplug, you're causing a tiny bit of wear and tear. Over thousands of times, that adds up.
Master the Art of Plugging and Unplugging
This might sound almost too simple, but how you connect and disconnect your cable matters. A lot. Most people just yank the cord at whatever angle is convenient. That puts a ton of stress on both the cable head and the delicate pins inside the port, which is a fast track to a loose, wobbly connection.
Instead, just remember two things:
- Grip the Plug, Not the Cable: Always grab the hard plastic or metal part at the end of the cable. This gives you direct control and stops you from straining the fragile wires where they meet the plug.
- Pull Straight Out: Make a conscious effort to pull the cable directly away from the device—not up, down, or sideways. A straight, gentle pull lets the internal pins release cleanly without getting bent out of shape.
Honestly, this one habit is probably the most effective way to prevent physical damage. It takes just a second of thought but can add years to your port's lifespan.
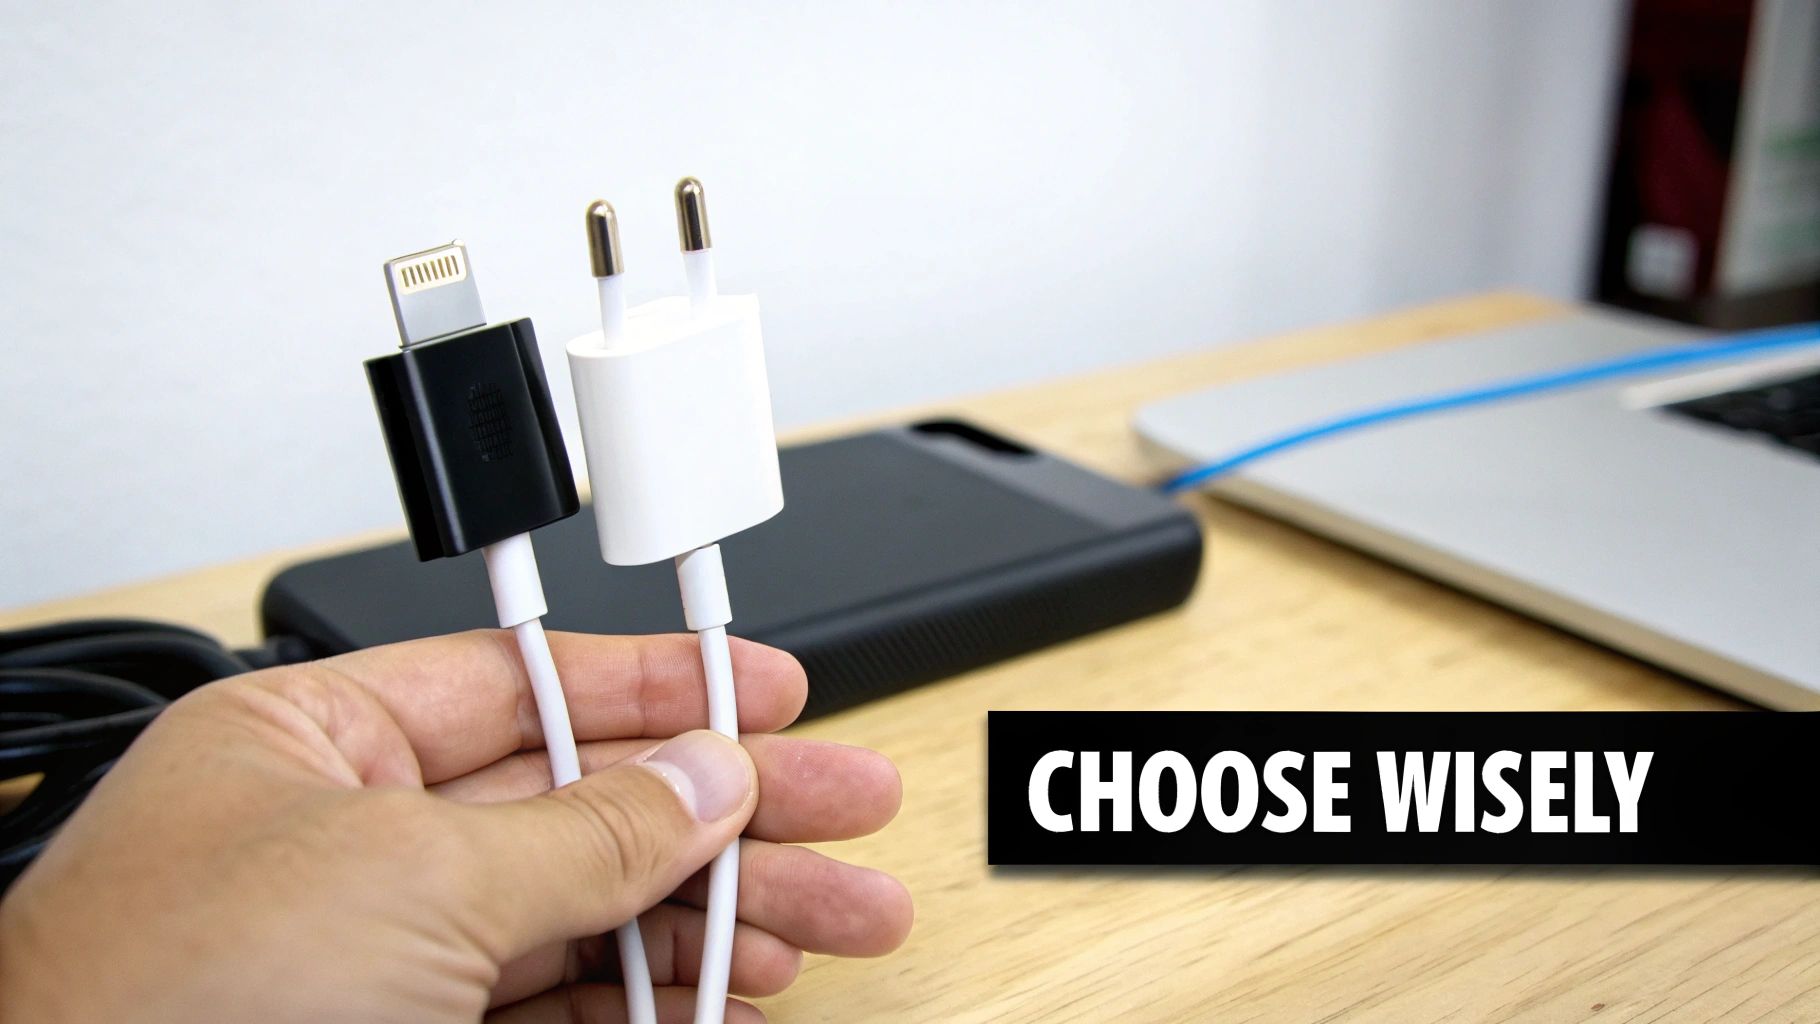
Choose Your Charging Accessories Wisely
Not all chargers are created equal. I've seen countless ports wrecked by cheap, uncertified cables and power bricks. These knock-off accessories often have poorly made connectors that don't fit snugly, causing that dreaded wobble that wears down the internal contacts over time.
Even worse, they can lack proper voltage control, sending unstable power that can fry not only the port but also the battery and other sensitive electronics. Stick with chargers from your device’s manufacturer or from reputable third-party brands that are properly certified.
A Proactive Approach to Longevity: It’s like getting an oil change for your car. Using quality accessories is simple preventative care for your electronics. A small upfront investment now can easily save you from a costly repair down the road.
Keep Your Environment Clean
Where you charge your device plays a bigger role than you’d think. Dusty, dirty, or damp places are a charging port’s worst enemy.
- Dust and Debris: If you work in a workshop, on a construction site, or just have a habit of tossing your phone into a bag full of crumbs and lint, that port is at risk. Tiny particles get packed inside and block the connection.
- Moisture and Humidity: Try to avoid charging in a steamy bathroom or right next to an open window on a rainy day. Moisture leads to rust on those delicate metal pins, causing spotty charging or outright failure.
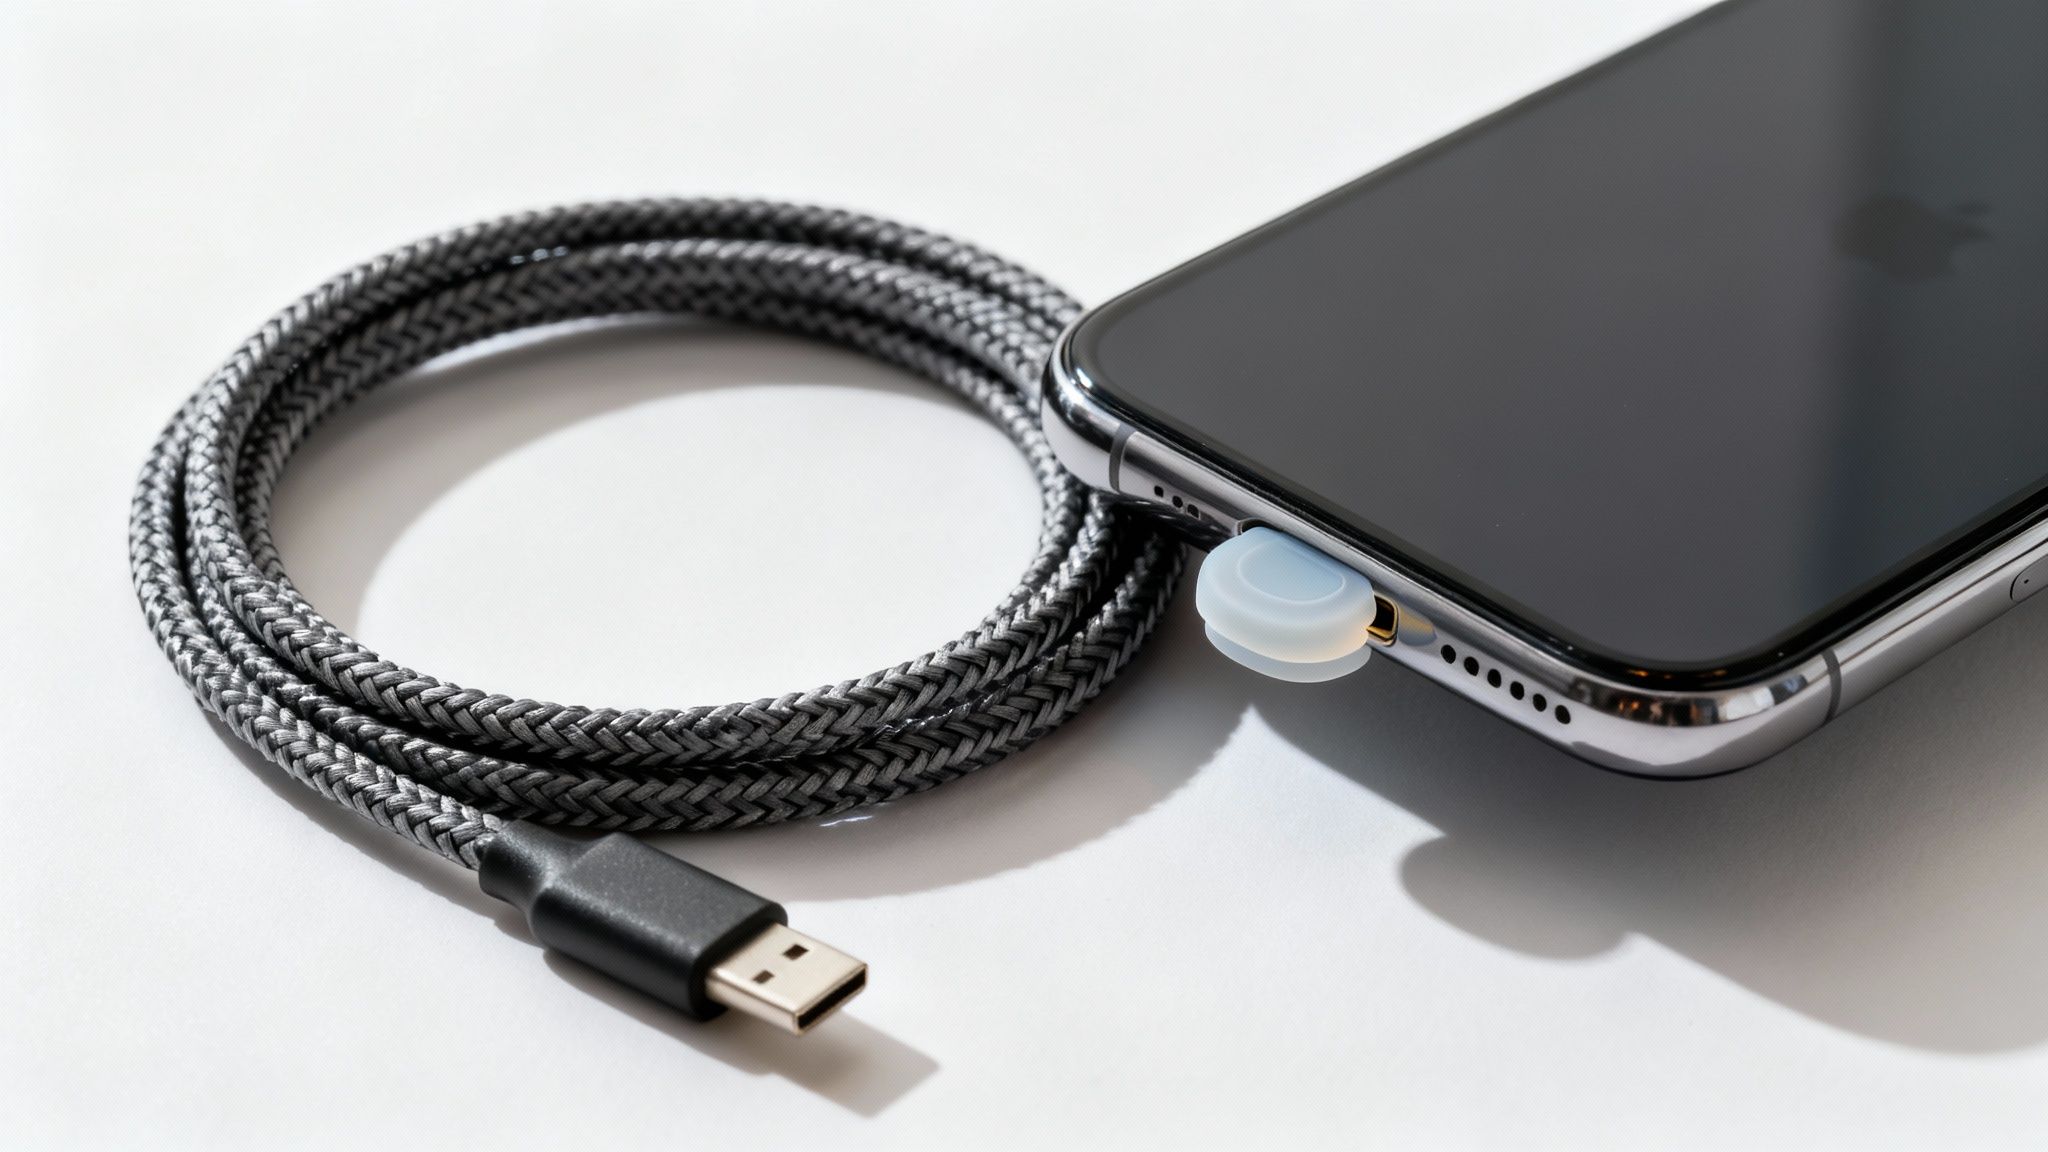
If you’re often in messy environments, a simple dust plug is a fantastic, cheap investment. These tiny silicone or plastic covers slide right into the port when you're not charging, creating a physical barrier against all that gunk.
Introducing Chargie—A Smarter Way to Charge
Beyond physical damage, the way you charge also impacts your device's health. Leaving your phone plugged in all night, every night, forces the battery to sit at 100% for hours. This puts a ton of stress on the battery and the entire charging system. That stress generates heat, which is the enemy of all electronics, especially the delicate solder points holding your charging port in place.
This is where a little gadget like Chargie comes in handy. It’s a small device that sits between your charger and your cable, letting you control the charging process through an app. You can set it to automatically stop charging at a healthier level, like 80%, which drastically reduces heat and slows down battery aging. It’s a smart way to protect the whole system, from the port to the battery itself.
Taking these preventative steps doesn't just help you avoid another round of figuring out how to fix a broken charger port; it also helps you be more sustainable. The global smartphone repair market is projected to hit a staggering USD 45.52 billion by 2035, driven by our ever-growing collection of complex gadgets. You can dig into the numbers yourself in this detailed smartphone repair market report.
By taking better care of our devices, we extend their lifespan, save money, and shrink our environmental footprint. Preventing common issues like port damage contributes to the larger goal of keeping electronics out of landfills. If you're interested, you can learn more about how to reduce electronic waste and make a real difference.
Got Questions About Your Charging Port? Let's Clear Things Up.
When you’re staring at a phone that won't charge, a million questions can run through your head. It's frustrating, and it's easy to get lost in conflicting advice. Let's cut through the noise and get you some straight answers to the most common questions I hear.
If My Port Is Busted, Can I Just Use a Wireless Charger?
You bet. If your device can be charged wirelessly, grabbing a certified charging pad is a brilliant and immediate workaround. This method completely bypasses the broken physical port, letting you power up without rushing into a repair. It's a lifesaver when you just need to get your phone working again.
For some people, this can even become a permanent solution, especially if you rarely use the port for things like data transfers. Just keep in mind that wireless charging is generally a bit slower than plugging in, but the convenience is often a worthy trade-off.
Is It Even Worth Fixing the Port on an Older Phone?
This one is all about the math. Your first move should be to get a repair quote from a shop you trust. Once you have that number, compare it to what your phone is actually worth today.
Here's my rule of thumb: if the repair costs more than half the phone's current value, you're probably better off putting that cash towards a new device. But if your old phone still does everything you need it to do, and you want to keep it around, a repair is almost always a smarter financial choice than buying a whole new one.
Think of it this way: You wouldn't sink $2,000 into an engine for a car that's only worth $1,500. The same logic applies here. If the fix is just a fraction of its value, it's a sound investment.
Why Does My Charging Cable Feel So Loose All of a Sudden?
That wobbly, loose connection is the classic sign of a worn-out charging port. It's the result of wear and tear from plugging and unplugging your cable thousands of times. Over time, the tiny metal pins and retaining clips inside the port bend, weaken, and just plain wear out.
But before you jump to conclusions, give that port a really good cleaning. A surprising amount of pocket lint and gunk can get packed in there, preventing the cable from clicking in securely. If it's still loose after you've cleared out any debris, then the port itself is likely damaged and will need to be replaced by a pro.
Can a Bad Charging Port Actually Damage My Battery?
Yes, and it's a risk you shouldn't ignore. A faulty port can feed your battery an unstable or inconsistent stream of power. This chaotic charging cycle puts a lot of stress on the battery, which can absolutely shorten its lifespan.
While modern phones have safety features to prevent disaster, a short circuit in a damaged port could, in rare cases, lead to bigger electrical problems. Getting that port fixed isn't just about convenience; it’s a crucial step in protecting the long-term health of your battery and the rest of your device. You want the whole charging system working together properly.
Of course, the best strategy is to prevent damage from happening in the first place. This is where the Chargie smart charging system comes in. It actively reduces the heat and stress on your device's entire charging circuit—port and battery included. By intelligently managing your charge levels, it extends the life of your electronics, potentially saving you from these kinds of repairs down the road. You can see how it works at https://chargie.org.